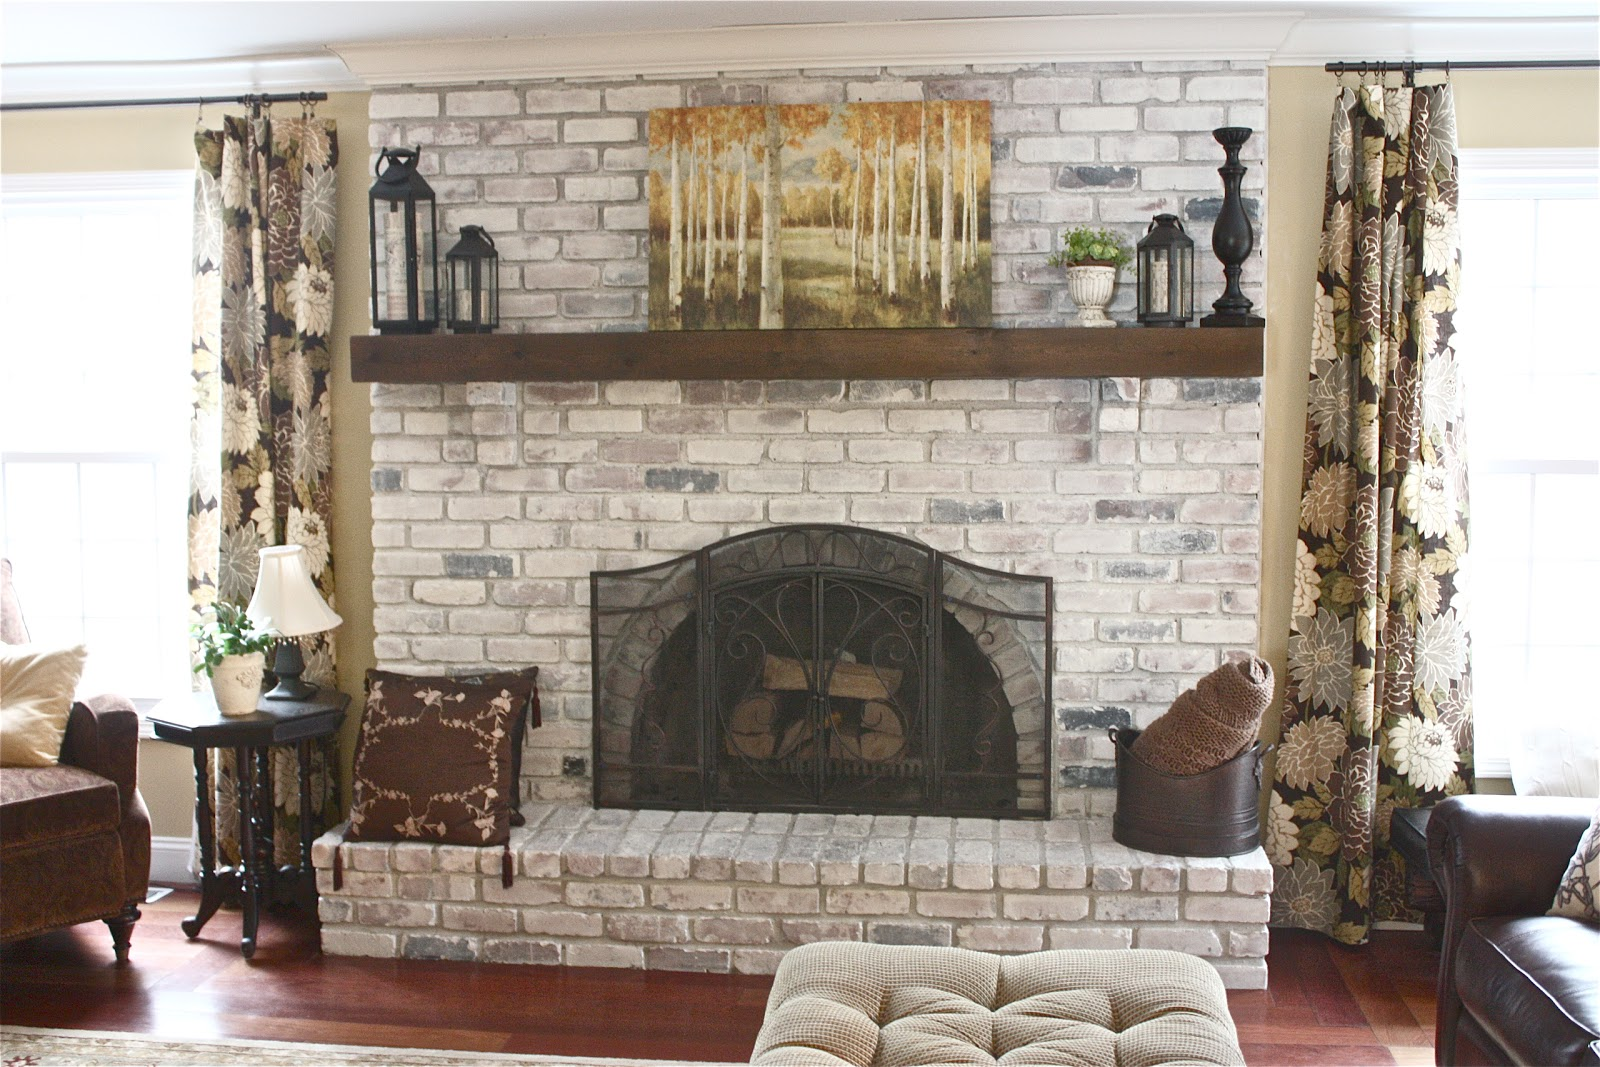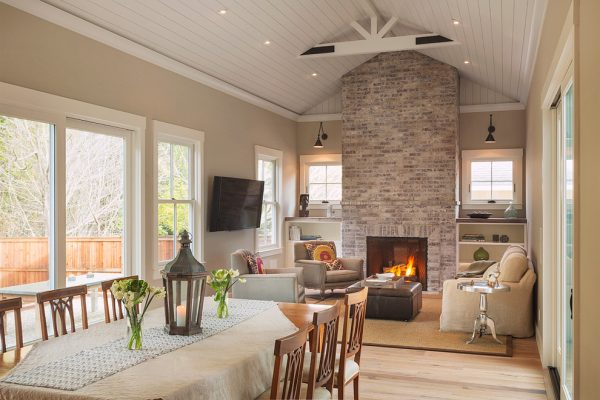
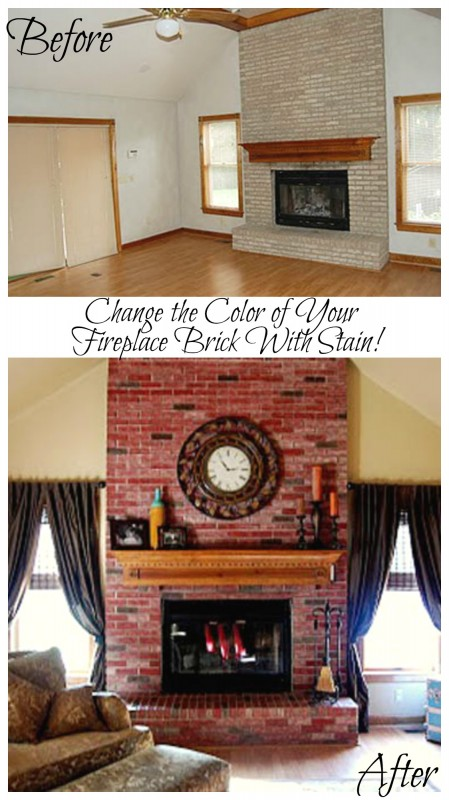
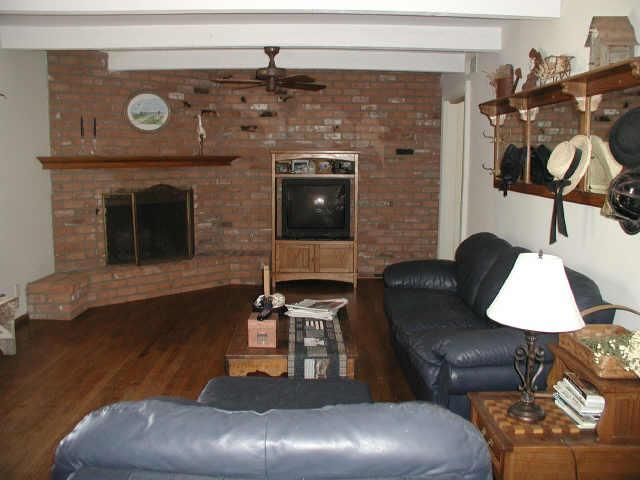
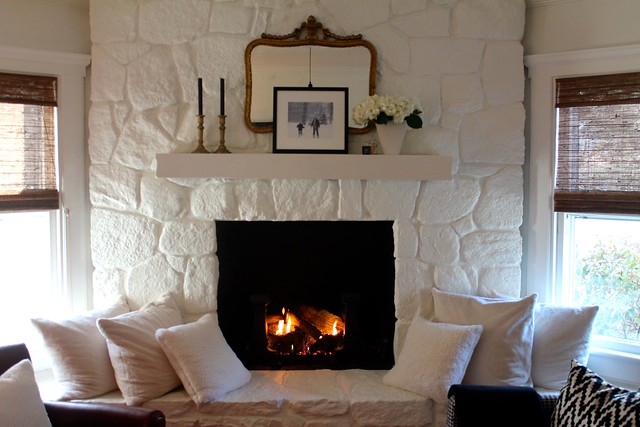
In many homes, the fireplace is the focal point of the living room and should be treated as a feature. If you have some time on your hands and feel like doing a bit of DIY home improvement, you may want to start a brick fireplace painting project.
When you paint a brick fireplace in a color of your choosing, it gives the feature and the rest of the room a breath of fresh air and can help a space feel rejuvenated. Check out our guide on how to paint a brick fireplace in your own home.
When it comes to painting your own fireplace, always remember safety first! For brick fireplace painting, you’ll need the following:
Now that you have all your equipment ready, it’s time to get started on the fun part!
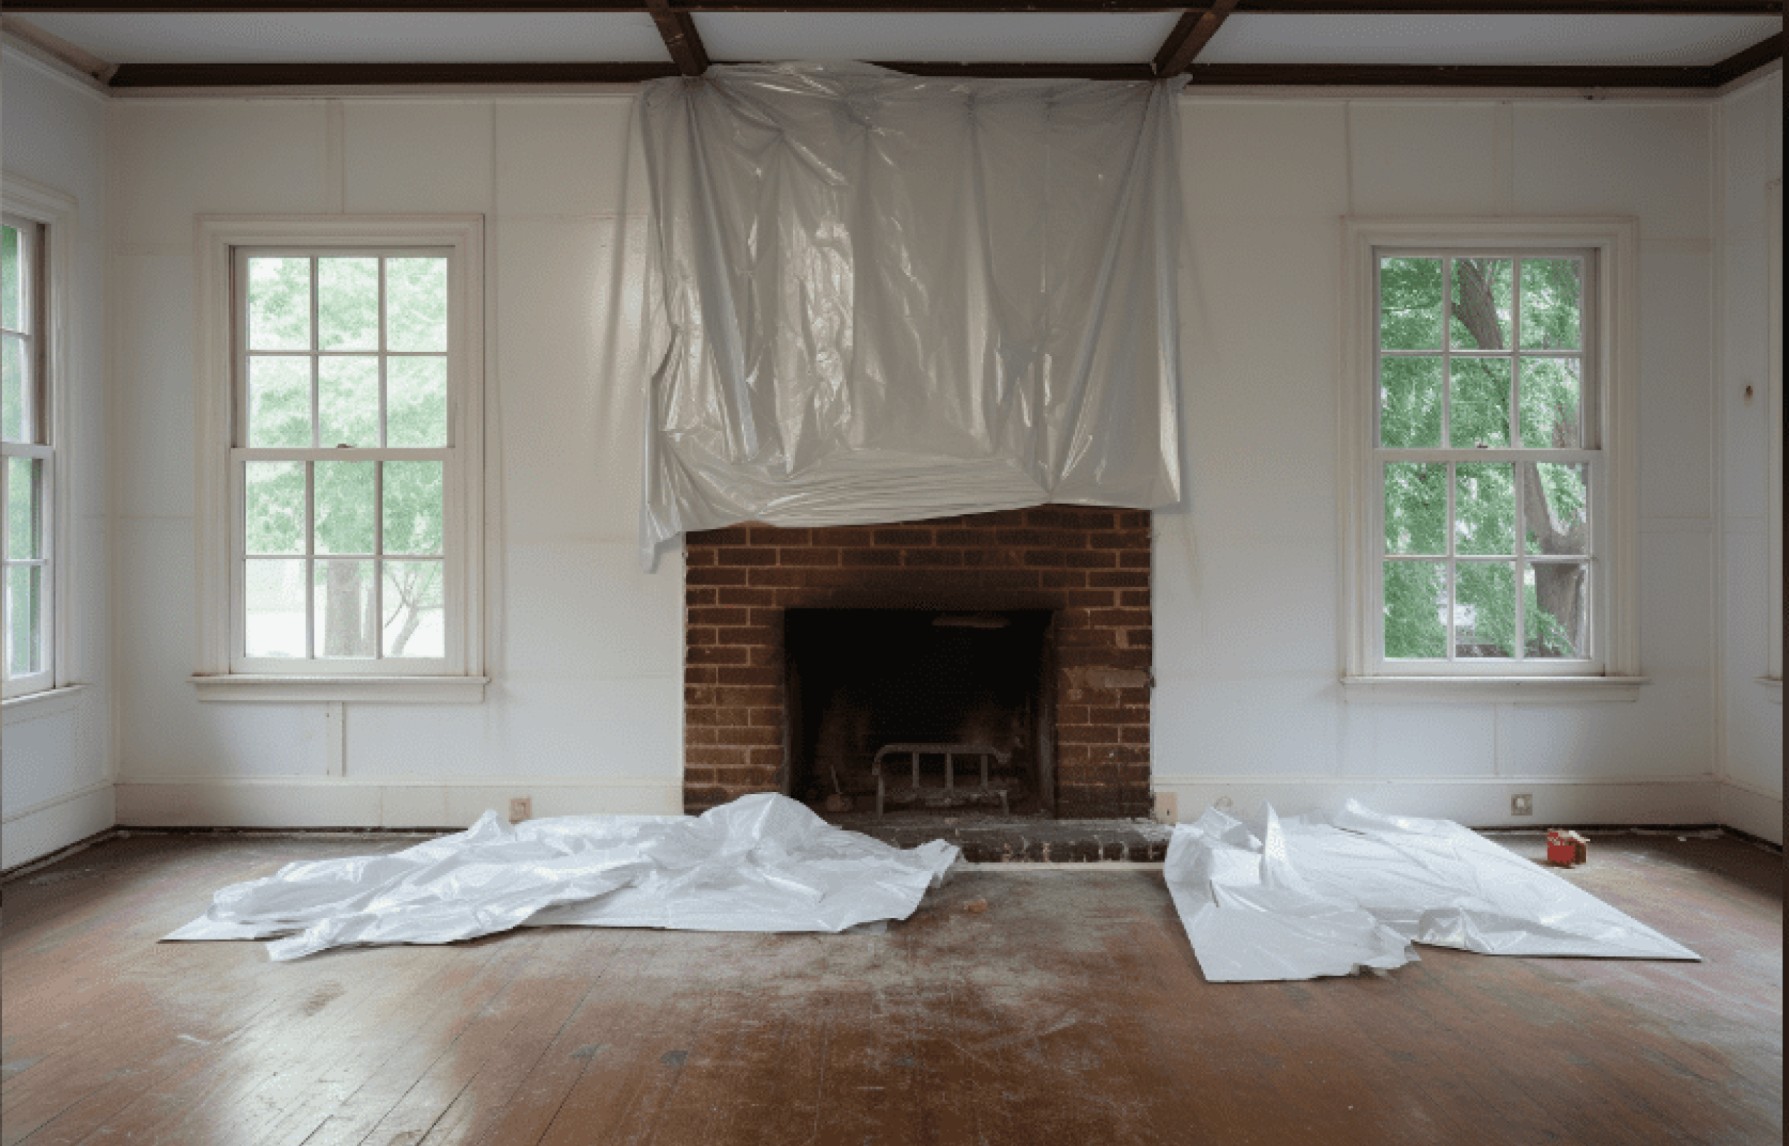
The first thing to do is to make sure the areas around your fireplace are protected from cleaning and paint splashes. Before you start anything, make sure your furniture and floors are covered with your drop cloths.
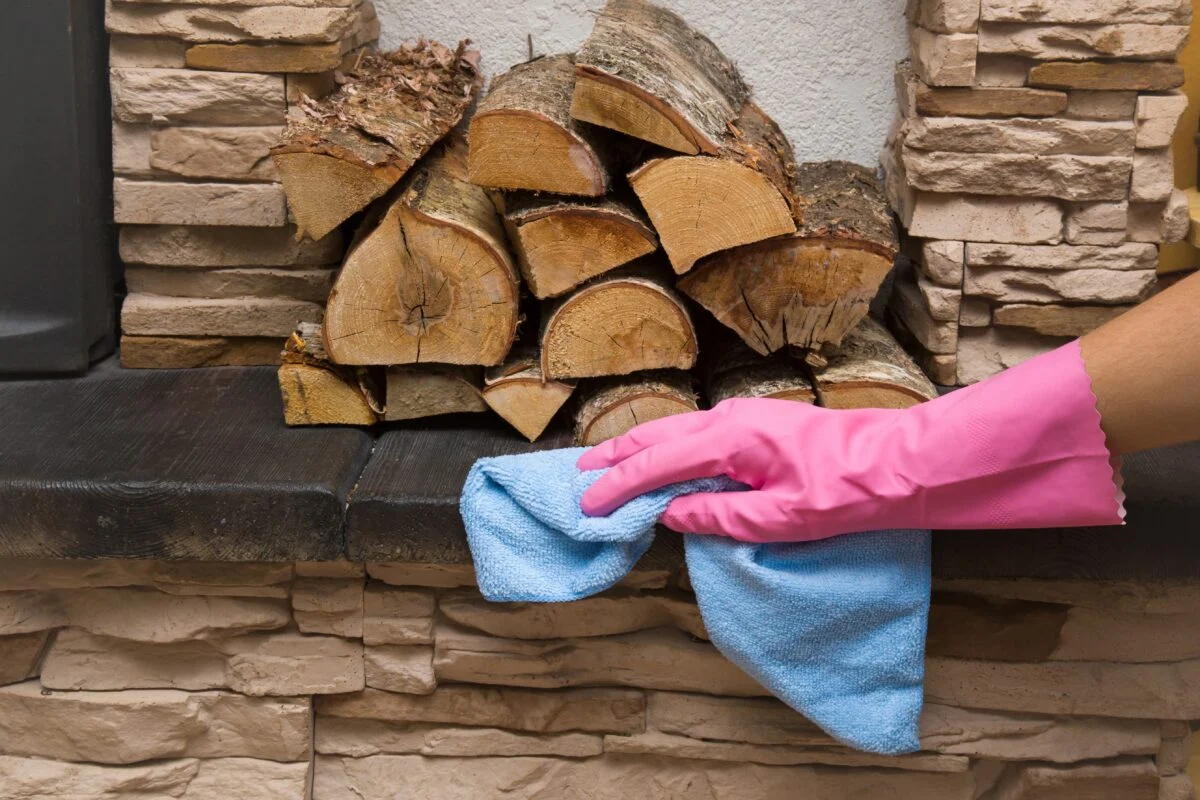
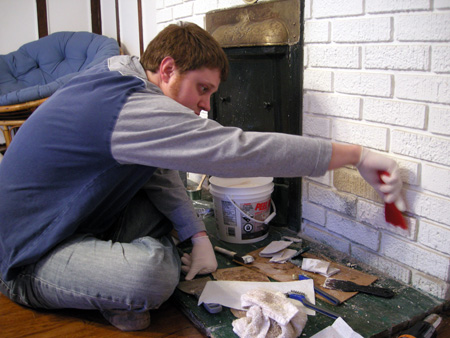
Next, you need to clean the brick fireplace. Cleaning it thoroughly will ensure the paint sticks to the bricks and that it dries properly. Using the wire brush, scrub away all the dust and dirt from the fireplace. Once clean, use a vacuum cleaner to remove any debris. You don’t want this getting into your paint when you start!
Next, coat the fireplace in TSP. Make sure you’re wearing rubber gloves and safety goggles when handling this product as it’s toxic when in contact with the human eye or skin.
Keeping your goggles and rubber gloves on, wash the fireplace using fireplace cleaner or soapy water. This will remove any straggling bits of debris that could affect your paint job. Let the fireplace completely dry and you’re ready to start priming!
Before you paint or prime anything, you need to make sure the surrounding walls are protected from any wandering brush strokes. Use masking tape or painter's tape to line where the brickwork meets the wall. This will ensure you have a clean finish at the end.
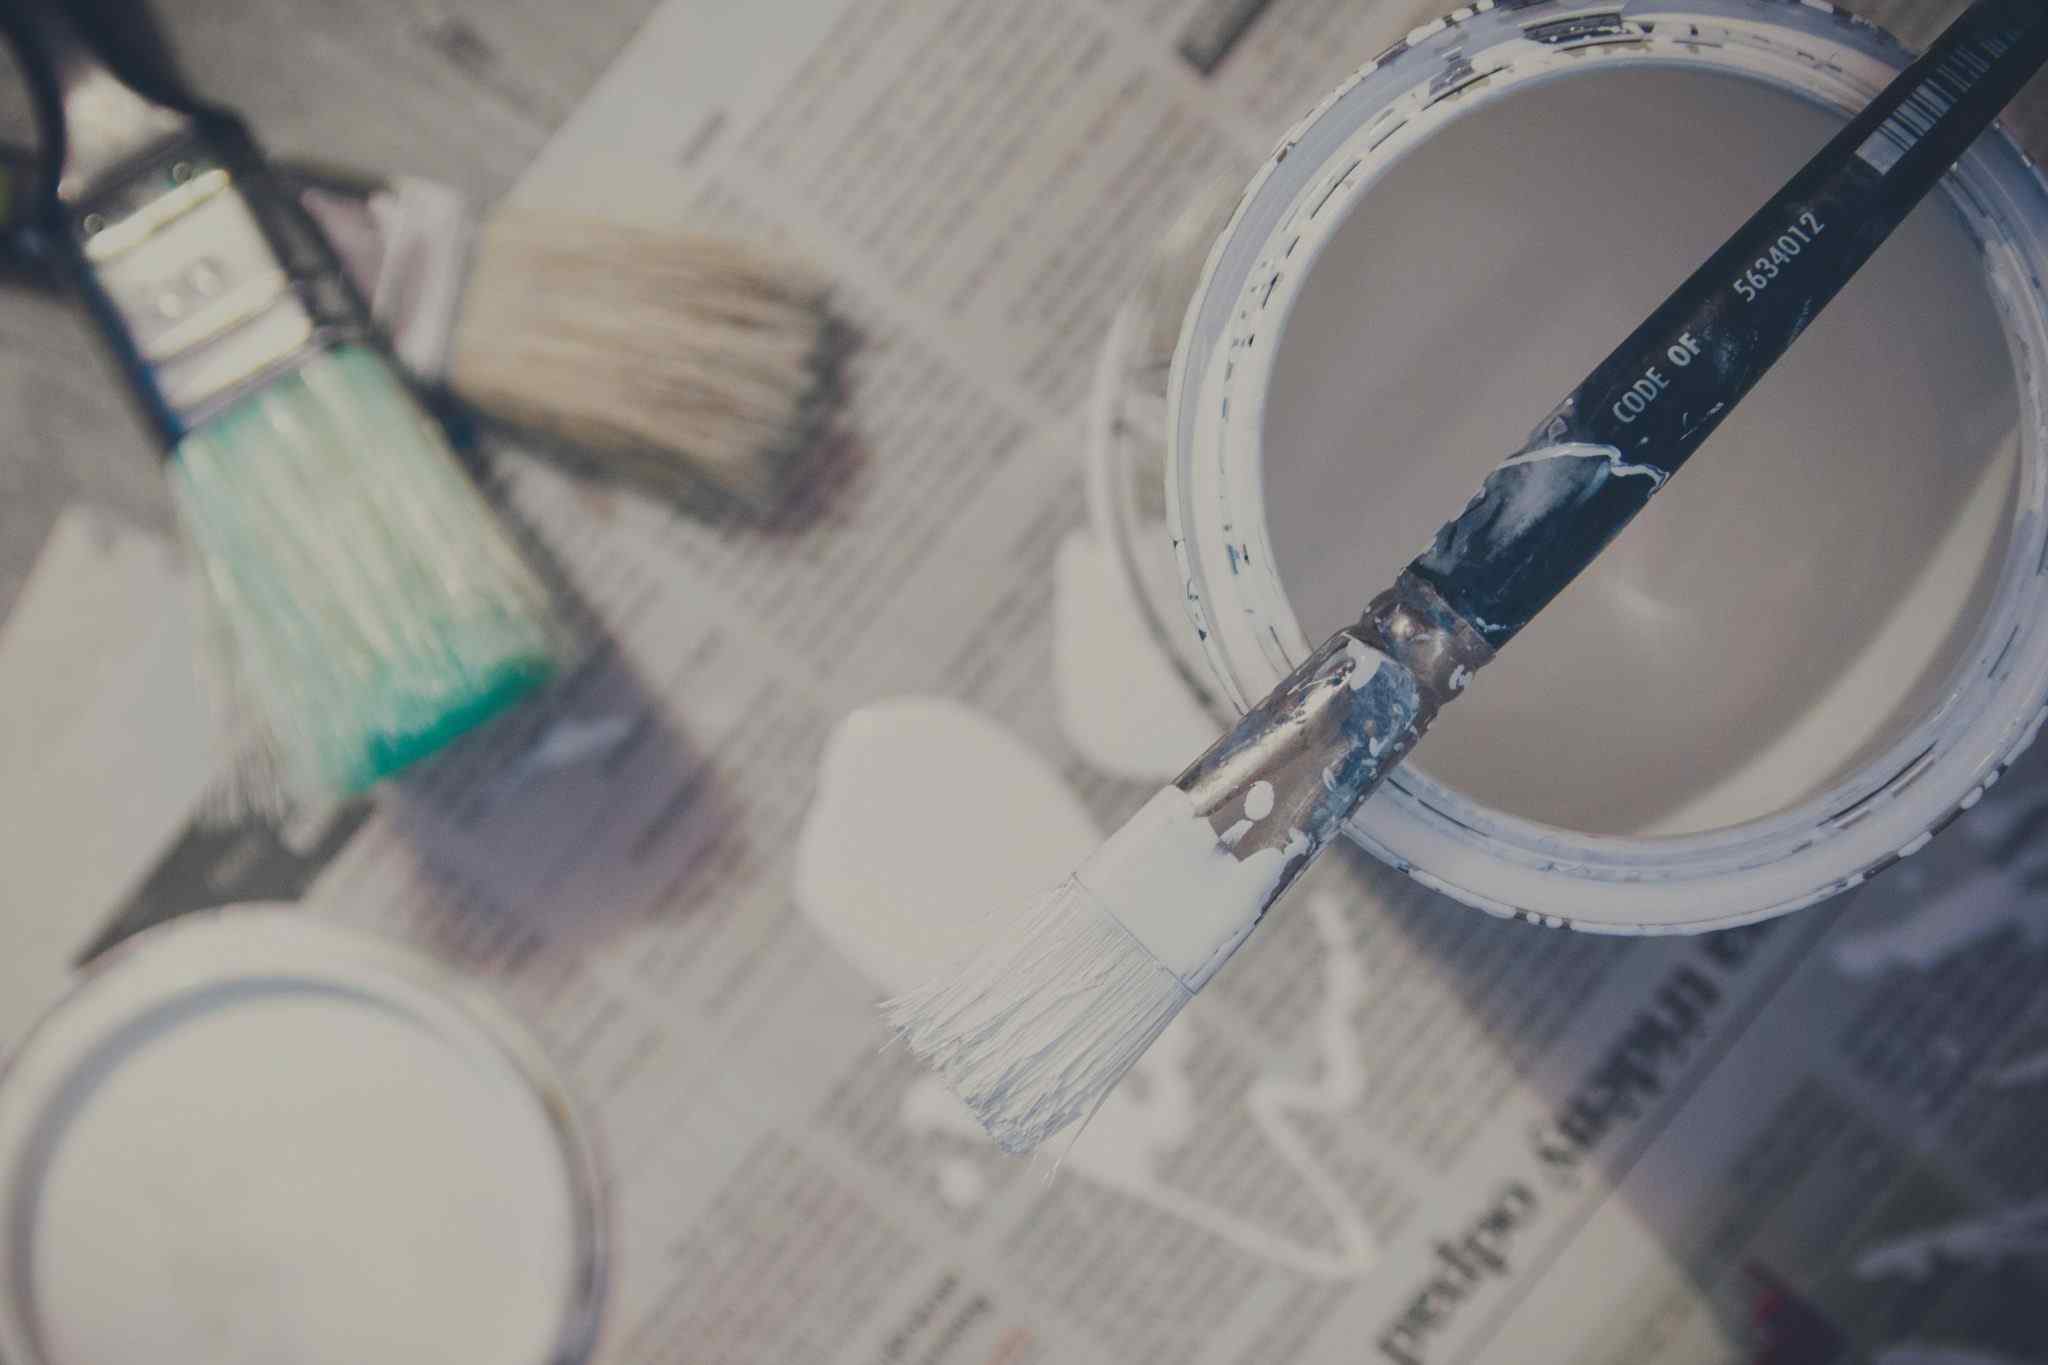
A primer is an essential part of the brick fireplace painting process if you want the final color to really pop! Depending on the texture of the bricks, you may need to apply two coats of primer. Bricks are usually porous so the primer may not cover all bases in just one coat.
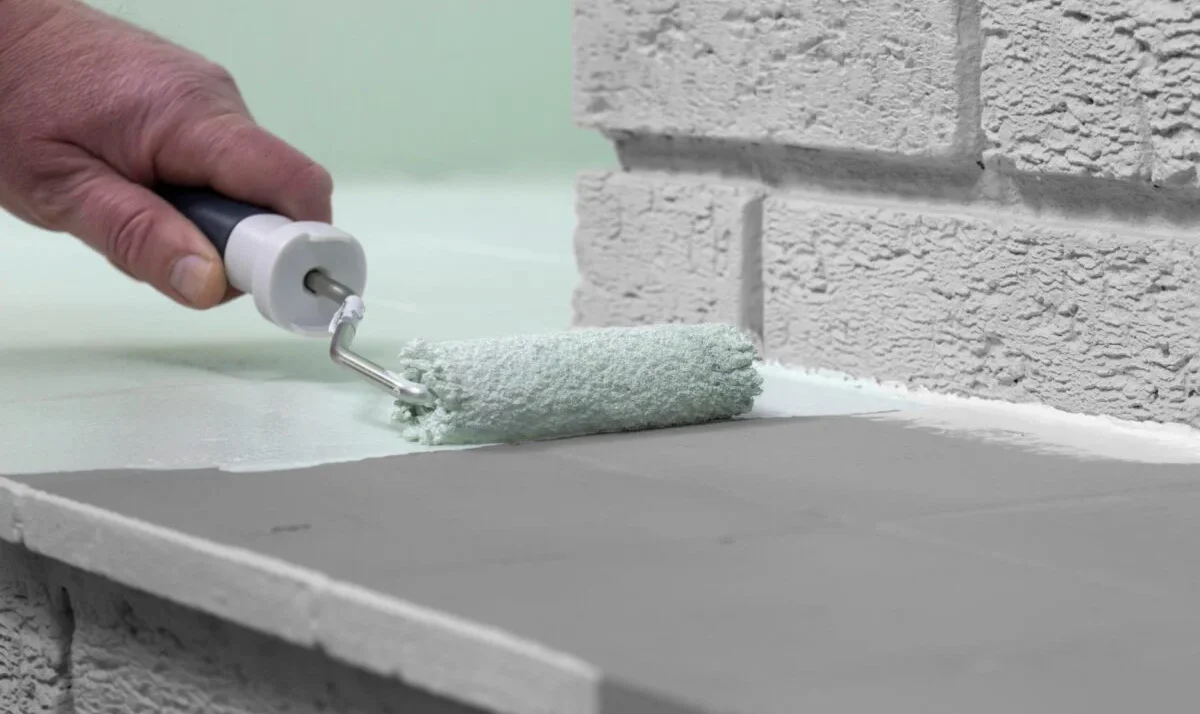
To start the priming process, use the smaller paintbrush to prime the crevices in between the bricks. This will ensure the whole fireplace is sufficiently covered. Next, use your roller paint brush to evenly prime the surface of the fireplace.
When you’ve applied enough coats of primer, let it dry overnight. Soak your paintbrush and paint roller in some water while the primer is drying. You can then use them again the following day when you paint the brick in your chosen color.
As a pro tip, aim to get a primer that has stain-blocking properties and acts as a sealer. This will ensure you get the best finish on your paintwork.
When you’re shopping for your dream fireplace color, there are a few technical specs to keep in mind. The paint you choose has to be heat resistant and be able to withstand temperatures of around 200°F. Keep in mind you’re not painting the actual firebox, but rather the room-facing brickwork on the outside of the fireplace. The best paint to use is latex paint suitable for indoor projects.
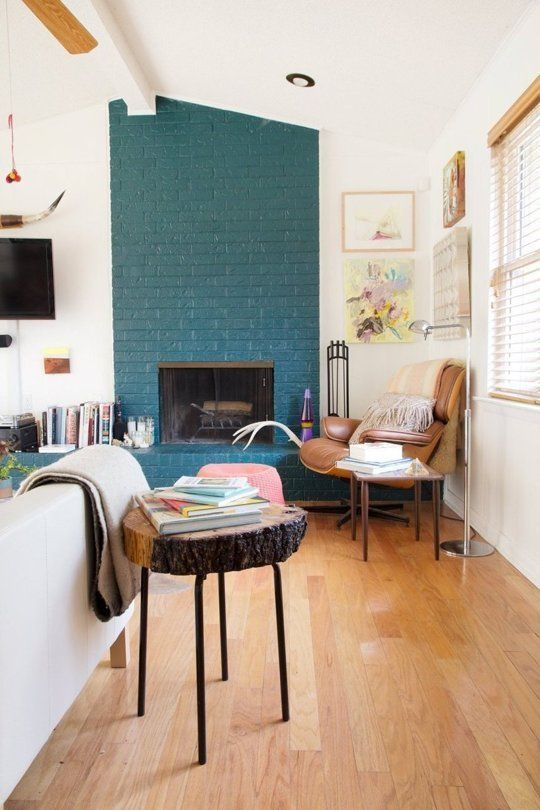
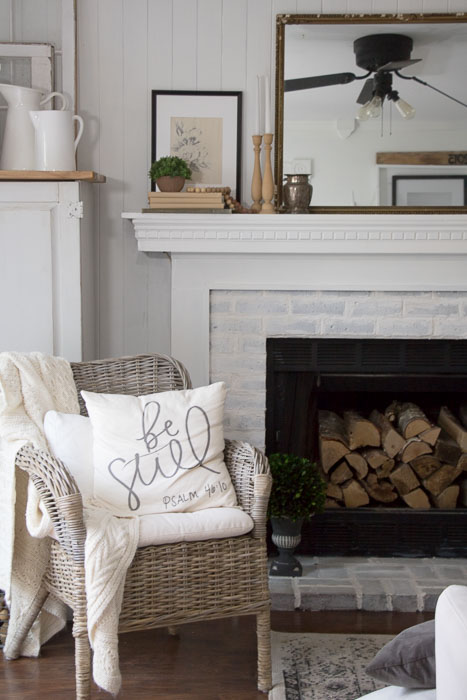
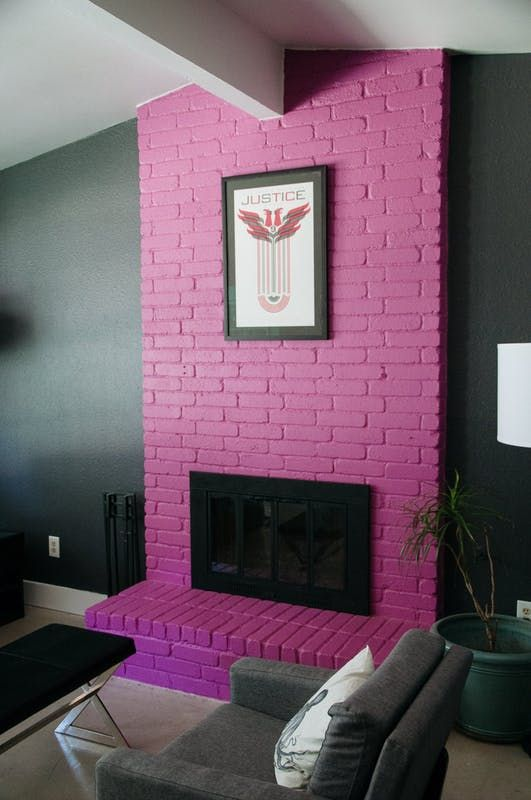
This very much depends on the type of look you’re going for. As mentioned, the fireplace is often the focal point of the room and often commands the atmosphere created in a space. Go for lighter paint colors if you want the room to feel airy, bright, and open. However, for bold looks, don’t be afraid to delve into the brighter, more vibrant side of the color wheel.
If you’re still not sure and need some more color selection pointers, check out our guide to choosing the perfect fireplace color here.
A nice, even finish is key to nailing a DIY brick fireplace painting project. The last thing you want to see is painting streaks or drips in the finished product. While the primer can help make sure you have a good finish, there is also a foolproof method of applying the final coats to your fireplace.
Firstly, you’ll need to apply a base coat. Painting your brick fireplace may require several coats to get the exact color and texture you want. Using a similar method to priming, use the paintbrush to make sure all the crevices between the bricks are well-covered in your base coat. You’ll also want to make sure the edges along the chimney and the mantlepiece are covered.
For the smoothest possible finish, use the roller for the flat surfaces of the bricks. You can always use the paintbrush again to touch up any gaps in the paintwork. Take a step back and assess whether or not you’re satisfied with the color. If you love it, there’s no need to apply another coat!
As soon as you’ve finished painting, have a look to see if there are any unwanted paint splatters and wipe them up with a damp cloth. It’s much easier to remove wet paint than dry!
Next, carefully examine your work to check that there are no gaps in the paintwork. If there are, use an appropriately-sized brush to touch these up with the top-coat color.
Once you’ve completed all the finishing touches, remove the masking tape and allow the paintwork to dry completely before using the fireplace again.

If you're just joining us, this is the last part of our fireplace painting guide. In part #1, we talked about whether or not you should paint your brick. In part #2, we talked about different colors and techniques you can use to paint your fireplace. In this part, I'll be giving step-by-step instructions for the methods we discussed in part #2. Let's get started!
You'll need to clean your brick before painting so that the paint will adhere properly. Start by using a broom or vacuum to remove an soot, dirt, or dust from the brick. Then you'll need to use a cleaner.
You can make natural brick cleaners with things you probably have in your house.
You can also buy cleaners specifically made for brick. Rutland makes a good brick and stone cleaner. It comes in a spray bottle. Simply spray on the brick and wipe clean.
For really tough stains, you can consider trisodium phosphate. This is a strong chemical that you can buy at your local hardware store. Make sure to wear appropriate protective equipment if you use it.
Whatever cleaning method you choose, make sure to thoroughly remove the cleaner and allow the brick to dry completely.
This is a quick and easy way to give your fireplace a facelift. Start by picking out an indoor latex based paint color; it can have any finish. (Not sure what color you want? Check out part #2 for some quick tips!) Then collect your supplies:
Now let's get painting!
Whitewashing your wood burning fireplace allows some of the natural color to peak through. You'll need:
Before you get started, be sure to cover any furniture and flooring with the drop cloth. You'll also want to put tape around the edges of the fireplace to ensure that you only paint the brick.
The German smear method turns your fireplace into a timeless centerpiece.
Like the other projects, start by protecting your surfaces with the drop cloth. Line the edges of your fireplace with painter's tape to avoid getting mortar on the surrounding materials.

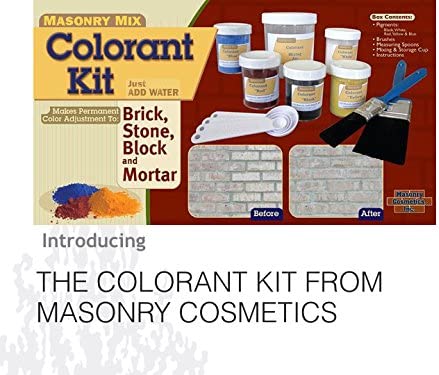
The Brick-Anew paint kit is made to be an easy DIY project that makes your fireplace look like it's been rebuilt with lighter brick. Even a beginner painter can achieve a super realistic look with this paint kit. If you choose to order this kit, you'll get all the supplies you need:
The Brick-Anew process involves painting on a base coat and then applying the five shades of “undertone” colors using a paint roller or a sponge according to the detailed instructions. The final result? A brick fireplace that looks like you ripped out the outdated brick and replaced it with a new lighter colored brick. The Brick-Anew Kit comes in three color choices.
Stain gives a very different look than paint. Pick out your favorite color and grab some supplies:
Let's get started!
The firebox is the part of your fireplace where the fire burns. After a long hard winter of hard work, the firebox turns into a filthy mess. Cleaning the firebox after fireplace season is over is essential to keeping your fireplace looking good. Let's get some supplies:
Painting your brick fireplace is be one of the best DIY projects you’ll ever do. Inexpensive and easy, painting can transform the look of your your fireplace and your living room in just a few hours. And if you don’t like the final look, no problem. Just paint over the brick again with a different color or choose another remodeling option.
If your outdated brick fireplace sucks the life out of your room, why not give painting a try? The fireplace should be the heart of the home, a soothing place for friends and family to gather or a spot to unwind after a hard day.
Start creating new memories by the fire. Paint your fireplace and see what happens. I think you’ll be glad you did.

During the cold winter months, your firebox (the inside area of your fireplace where you burn wood) takes quite a beating. If you're tired of looking at the mess of dirty ashes and soot stains in your fireplace, it might be about time to do some home improvement and give the inside of your fireplace a fresh coat of paint.
Here is a step-by-step guide detailing all that you need to know on how to paint the inside of a fireplace.
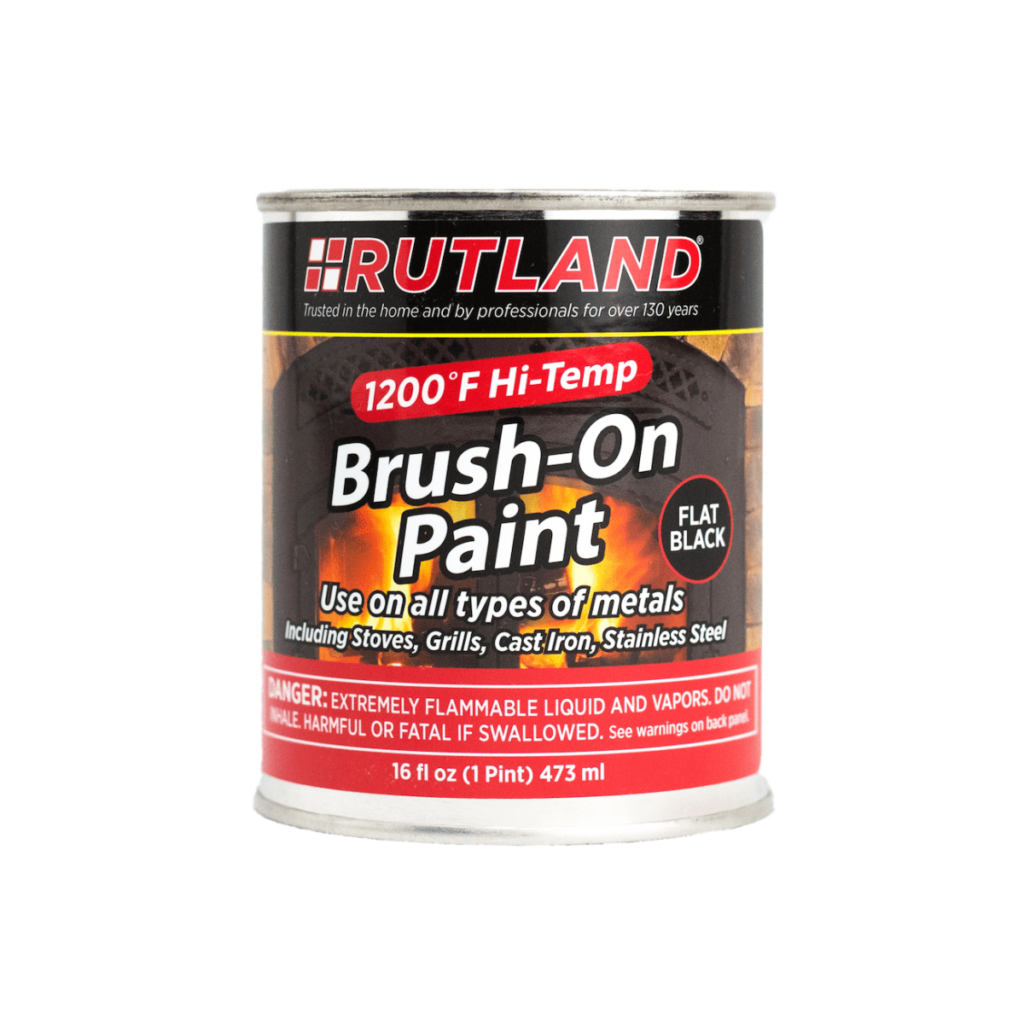
Your firebox can reach temperatures upward of 500 degrees Fahrenheit while burning. That means your average paint is going to quickly peel and chip off. Instead, you'll need to get some inside fireplace paint that can withstand the heat from your fire.
There are two types of heat resistant paint for fireplaces: spray and brush-on. Spray paint can be applied quicker, but brush-on paint gives you more control over the coverage.
You'll need to decide on what color to use since high-heat paint comes in a variety of shades. Basic flat black fireplace paint is a good choice; it's a neutral color and can hide soot easily. Black also tends to look nice with almost any fireplace and room decor.
Beige, off-white, or almond create a fresh, bright look. These are good choices if you only use your fireplace a few consecutive months out of the year. The paint won't be stained by soot during the off months and will hold up without peeling during the months you do burn in your fireplace. I'd definitely recommend keeping some paint on hand to touch up any soot stains during the "on" season.
You can pick up heat resistant paint online or at your local Home Depot. You can use paint like this on all sorts of surfaces: painting the interior of your fireplace, painting wood burning stoves, etc.
Lay a drop cloth or old sheet down in front of your fireplace so you won't get your carpet or floor dirty. Remove any leftover wood, soot, and ashes using either a vacuum or a sturdy broom and dust pan. Deposit all debris into a large trash bag or old container for disposal.
Quick Tip: Practice good fire safety! Make sure all the embers have gone out and cooled before you start.
If you have a metal log holder, take it out of the firebox. Once cleaned with soap and water, this can be painted as well.
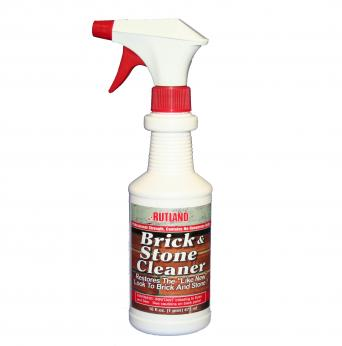
After the firebox has been emptied, use soap, water, and a good firebox cleaner to scrub the firebox. Rutland makes a good brick and stone cleaner formulated to remove creosote and soot. A long handled scrub brush is certainly helpful, though not necessary. Make sure to rinse out any cleaner or soap and let the fireplace dry before painting.
Brush or spray the high temperature paint covering the walls, sides, and floor of your firebox. Start at the top/back and work your way down and towards the front. The odor will be strong, but once the paint dries, there will be no odor.
Quick Tip: Most high temperature paints emit strong odors and fumes, so be sure to have plenty of ventilation while you are applying. You may also want to wear a mask and rubber gloves.
Whew! Now you're finished. Your living room is totally updated; what a huge difference painting the inside of a fireplace makes!
Your updated fireplace interior may make your firebox look a little shabby in comparison. No worries though!
You can update your fireplace the same way: with paint! There are all sort of techniques to paint a brick fireplace to totally transform it. Check out this article for some inspiration!
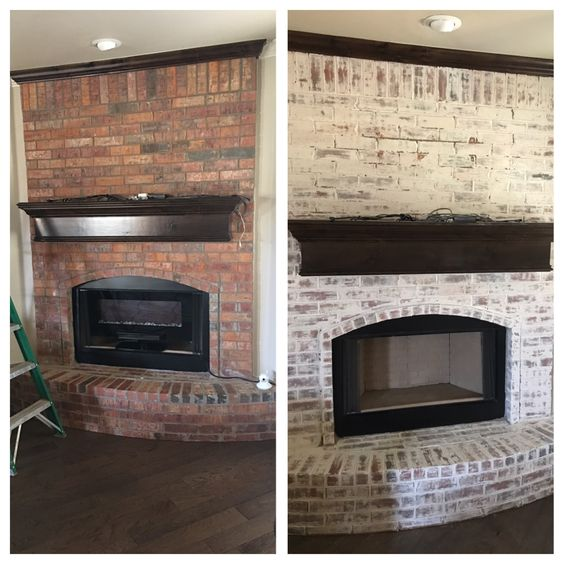
After spending endless hours on Pinterest scrolling through beautiful before/after pictures of painted fireplaces, you’ve finally decided to take the plunge and remodel your fireplace with paint. Now you’ve got another decision to make. Do you want a whitewash fireplace or a limewash fireplace? What’s the difference in whitewash and limewash anyway?
To put it simply: limewash is a specific type of whitewash that uses a mixture of limestone, tint, and water instead of latex paint. You can whitewash your brick with either a latex paint or a limewash. Both techniques are water-based and work well on porous surfaces surfaces such as brick. Whitewashing tones down the bricks’ natural look by coating them with a solid thin layer of paint. Limewashing also involves painting on a thin layer but allows you to remove the paint easily within five days if you’re not happy with the results.
Whitewash painting refers to applying water-based paint mixed with water to brick. Applying this thin layer of paint tones down the natural colors in the brick, allowing a little brick to peek through. Whitewashing is fairly easy, even for the most inexperienced DIY newbie. It doesn’t cost much and the process is prety quick depending on the size of the area to be covered.
So, there you have it! White washing or lime washing your outdated brick fireplace can bring new life to your room. You can choose your shade of paint for either technique so whether you’re partial to an eggshell white or a soft gray, you can find the shade just right for your room.
Both paint processes allow you not only allow you to get the look you prefer by deciding on the paint shade but also how much paint you want to apply. Whether you want a more solid whitewashed look or a more distressed “old world” look, you can breathe new life into a tired old fireplace in just a few hours using either of these paint techniques.
Materials You’ll Need:
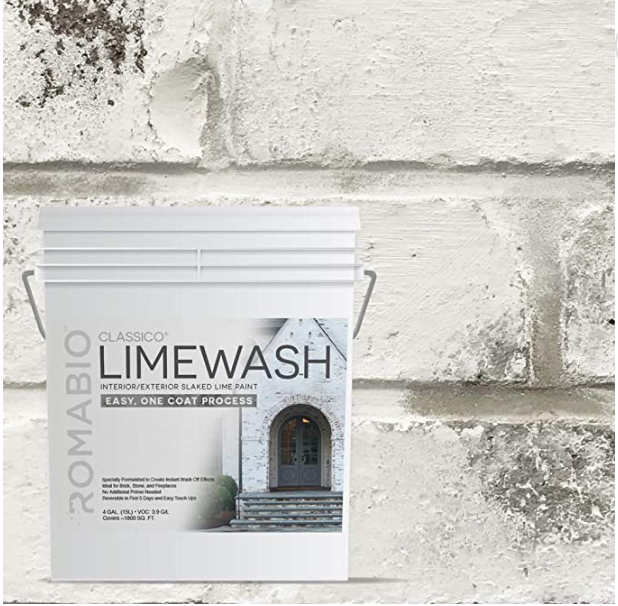
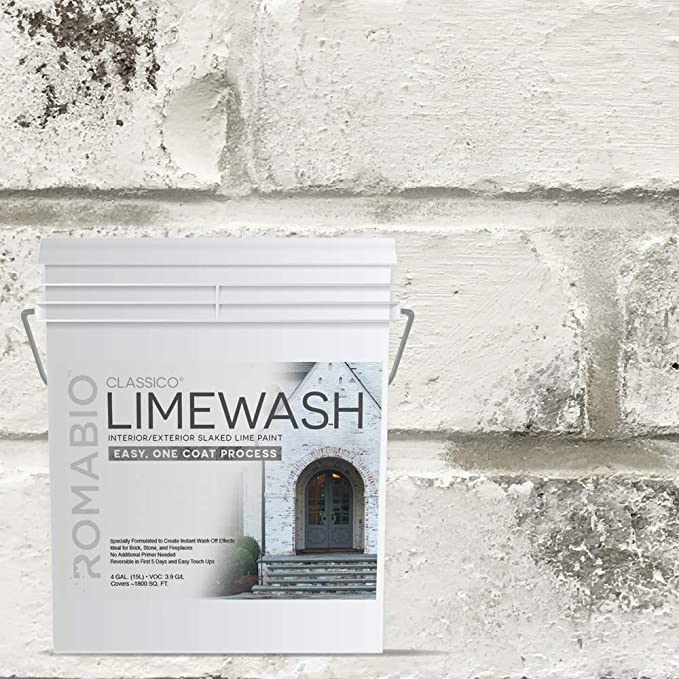
Limewash paint has limestone in it which has been crushed to turn it into putty. After that, the putty is thinned using water. It’s usually white but you can buy tinted versions as well. The result is a matte, chalky look. Limewash paint “breathes” easily so moisture doesn’t get trapped in the bricks. But since your fireplace is inside your house, moisture won’t likely be a problem. If you’re not into mixing up your own limewash, there’s a product called Romabio that has the paint mixed for you which makes the process super easy. An advantage to this technique is that if for some reason you’re not thrilled with the results, you have about 5 days to easily remove the paint.
Materials You’ll Need:
Not sold on limewash or whitewash? Here's some other options you may want to consider for your fireplace painting project:
If you’re not into the look of exposed brick or have a previously painted fireplace, you may want to consider this DIY fireplace paint kit from Brick-Anew. Brick-Anew is one of our favorite new fireplace painting products. Unlike painting your fireplace a single coat or color, Brick-Anew’s specially formulated paint gives your fireplace a completely new look (similar to the dimensional look of limewash) while still maintaining the feel & texture of natural brick. The kit comes in 3 different color schemes and includes all the required tools as well as a step-by-step instructional video (which, customers write, removes the need for any artistic ability).
UPDATE: Brick-Anew now offers a paint kit for stone fireplaces as well, which is available for purchase on their website.
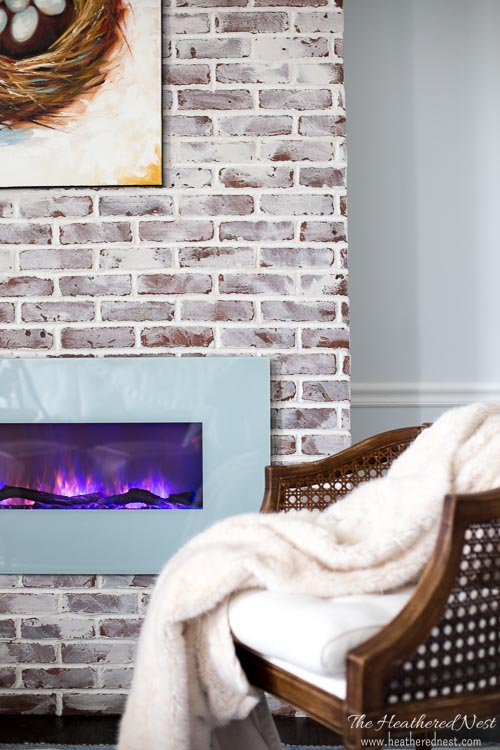
Named after it’s origination in the historic castles of Northern Germany, the German Smear is another close relative of the whitewash technique. Technically known as a “mortar wash,” the German Smear is achieved by applying wet mortar to the brick, instead of latex or lime.
You can either mix your own mortar or use a pre-mixed mortar to speed up the process. Unlike whitewash, the mortar does not get absorbed by the brick, but rather hardens over the surface.
Read more about the German Smear technique here.
So there you have it! Whether it’s whitewashing, limewashing, German Smear, or using alternative products like Brick-Anew, there’s no wrong answer to updating that old fireplace of yours. Just choose the look that speaks to you, and don’t look back. Have you had a great experience with another fireplace painting technique or product? Let us know in the comments below! And be sure to check out our blog for more information and helpful articles regarding fireplace painting.
One of the most effective ways to transform a room is to paint your stone fireplace. Stone is a wonderful material to work with as it provides homeowners with versatility and offers you a foundation for many different color schemes.
There are several popular painting techniques used by interior designers that you can incorporate into your home. These design techniques are used to brighten up a space and allow the room to work with natural light and other key features. In this guide on how to paint a stone fireplace, we’ll take a look at the materials and tools you need to use to do it yourself, in any color you want.
Painting a stone fireplace can significantly transform the aesthetics of your room by creating a fresh, modern look. If you’re looking to whiten a dark stone feature or refresh an old fireplace, this guide is a step-by-step to stylish results. Stone may appear to be difficult to paint, but in fact, it is a very simple practice that can be carried out with the right materials and preparation.
Before starting, gather all the necessary supplies:
These tools will ensure you can complete the job efficiently and without mishaps.
Start by cleaning the stone surface completely. Dirt, dust and oils can get between the paint and its adherence, so it’s crucial to scrub the stone clean. Use a mild soapy solution, or a particular stone cleaner with a scrub brush or sponge. Watch out for grout lines and crevices. Once clean, rinse off with water and let the stone air dry completely. Cleaning it well makes sure that the primer and paint can bond properly, which gives you a better finish.
Then, secure the adjacent spaces. Use painter’s tape to tape off the edges around the fireplace like the mantle, walls and flooring. Press down firmly on the tape to keep paint from getting under it. Spread drop cloths or plastic sheeting on the ground to catch paint drips. This stage keeps your project tidy and helps ensure that only the stone gets a coat of paint.
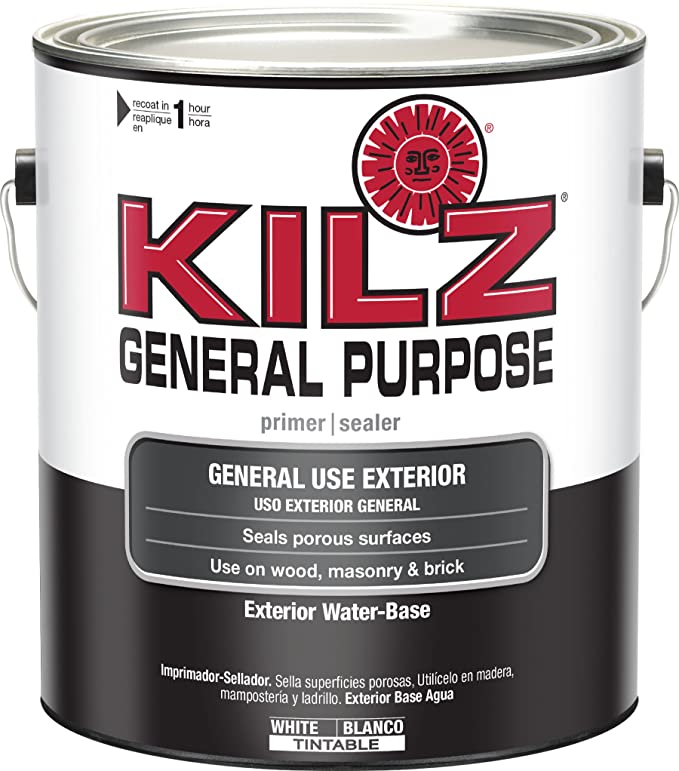
The paint requires a primer to be able to stick effectively to the porous surface, otherwise the coverage will be uneven, and the paint will peel easily. Select a quality primer tailored for masonry or stone. Use a paintbrush for the small, detailed parts and a roller for the flat areas. Cover the whole surface of the stone. Allow the primer to dry completely before continuing, which can take a few hours.
When the primer dries, we’re ready to paint. Select a masonry-specific paint, like chalk paint or a high-quality latex paint. Use a paint roller to apply the first coat on the larger sections and an angled brush for any corners and crevices. Apply in very thin coats to prevent drips and streaks. Repeat this process with four even coats, allowing each coat to fully dry before applying the next.
When you’re happy with the paint’s look, gently pull off the painter’s tape before it has dried completely, to ensure that lines remain crisp. Allow the paint to dry fully before using the fireplace.
Painting techniques that give the stone a solid color look include whitewashing and painting. But what if you want to lighten your fireplace while keeping the look of real stone? Brick-Anew Stone fireplace paint kit is a product designed to do just that.
This all-inclusive paint kit comes with everything you need to remodel your stone fireplace (or brick) and keep the variegated look of natural stone. You can choose from three kit colors - Twilight Taupe, Misty Harbor, and Frosted Sunshine. Each kit has its own unique 5-shade latex product combination as well as an instructional video and tool kit that help you transform your ugly outdated stone into a beautiful modern stone fireplace in just a few hours.

Painting a stone fireplace a solid color like white can change the look of your room in just a few hours.
When deciding on painting fireplace stone a shade of white, consider the look you’re trying to achieve. Think about your wall color and a shade that would complement the room nicely. There are many shades of white, from creamy beige undertones to yellowish undertones. So be sure to hold up paint samples to see which shade looks best with your wall color. You don’t want the shade to look too stark. If white doesn’t work for you, you might decide on a light neutral shade of gray or tan.
First, clean your stone by brushing off dust and dirt with a small broom. You can use a sponge or scrub brush and a bucket of soap and water to remove any grime or soot. Next, use painter’s tape to tape off the area you’re going to paint to protect the floor and the walls. Then, lay down a drop cloth on the floor in case the paint drips.
After the stones are dry, use a sturdy paint brush to brush one or two coats of an oil-based primer all over the stone and mortar. Then you can choose the water-based paint shade of your choice for your painted stone fireplace, for an instant transformation! Check out this beautiful “after” picture from Greige Design.
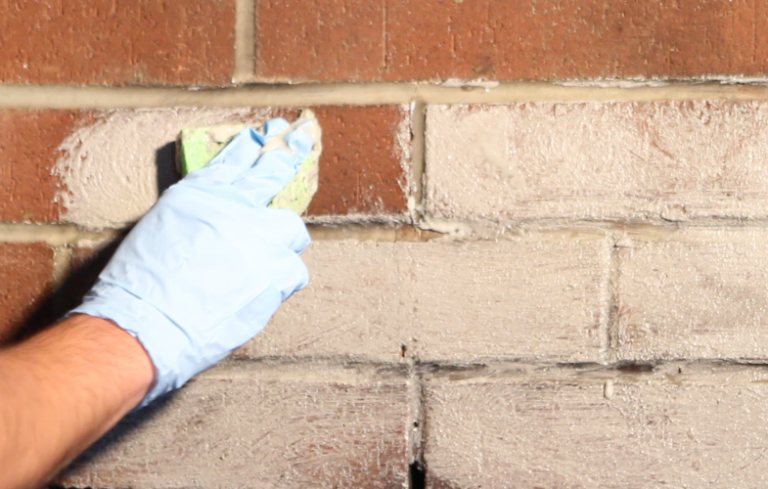
When painting fireplace stone, you might ask yourself; can you whitewash a stone fireplace? Sure, you can. Whitewashing a stone fireplace involves creating a mixture of paint and water and then brushing the mixture over the stone to create a “whitewashed” look.
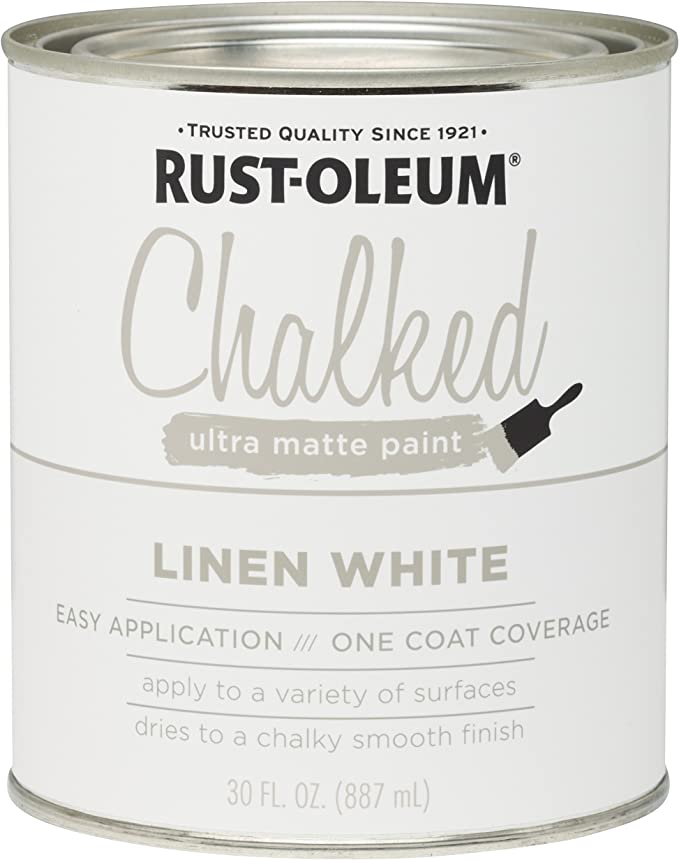
Whitewashing your fireplace with chalk paint is one option for this technique. Keep reading to learn how to whitewash your stone fireplace.
Supplies for whitewashing include:
First, you’ll need to spray your stone with stone cleaner and wipe it off with a damp sponge or rag. You can also use warm soapy water. (If your stone is very dirty, you might want to use a stronger product such as TSP). Removing any dust, dirt or soot ensures the surface is clean before you begin painting. Then lay down a drop cloth to protect your floors. The mixture you’re going to create will be thin and drippy, so you’ll want to make sure the drop cloth is large enough.
Next, create a 50/50 mixture of white paint and water. You can decide how much paint you want to mix at a time. Just make sure each time you mix, that there are equal parts paint and water. Use your brush to apply the paint mixture to each stone as well as the mortar, making sure you get in all the cracks and crevices. Work in one small section at a time. Most stone is porous and will soak up the paint as soon as it’s applied. You can wipe off any excess as you go. Since the mixture is thin and watery, there are no worries about seeing brush strokes on your stone.
If you choose to paint on another layer, wait for the first layer to dry completely before applying the next. (For example, you could apply a gray-wash layer using a gray-tinted paint and then apply a white-tinted layer.)
On her blog, Stars + Field, artist Jessica describes how she transformed her outdated painted stone fireplace using gray chalk paint. Her project turned out amazing!
When trying to decide to use the limewash or the whitewash techniques for your painted stone fireplace, there are several things to consider. On the positive side, limewash is anti-microbial, natural, and eco-friendly. On the other hand, limewash is more difficult to work with than whitewash, has limited availability and color choices, and needs to be redone about every few years.
However, whitewash is very simple to apply and you can change the color later if you decide you want a different look. The only downside, as it always is with painting stone, it’s difficult to remove if you get tired of the painted look.
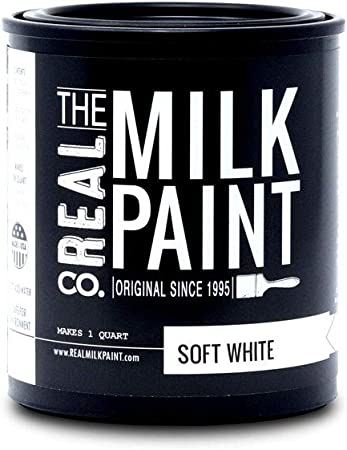
If you're only just getting into stone fireplace painting, it would be surprising if you had heard of milk painting. Well, apparently this type of paint has been around for years. It’s made of dried milk protein and casein mixed with dye to make colors. Sold by TheRealMilkPaintCompany, this paint comes in black, white, and a variety of colors. Milk paint can be applied to the stone and wiped off as you go. Or you can apply the milk paint and then sand areas of the stone to make it look old and worn.
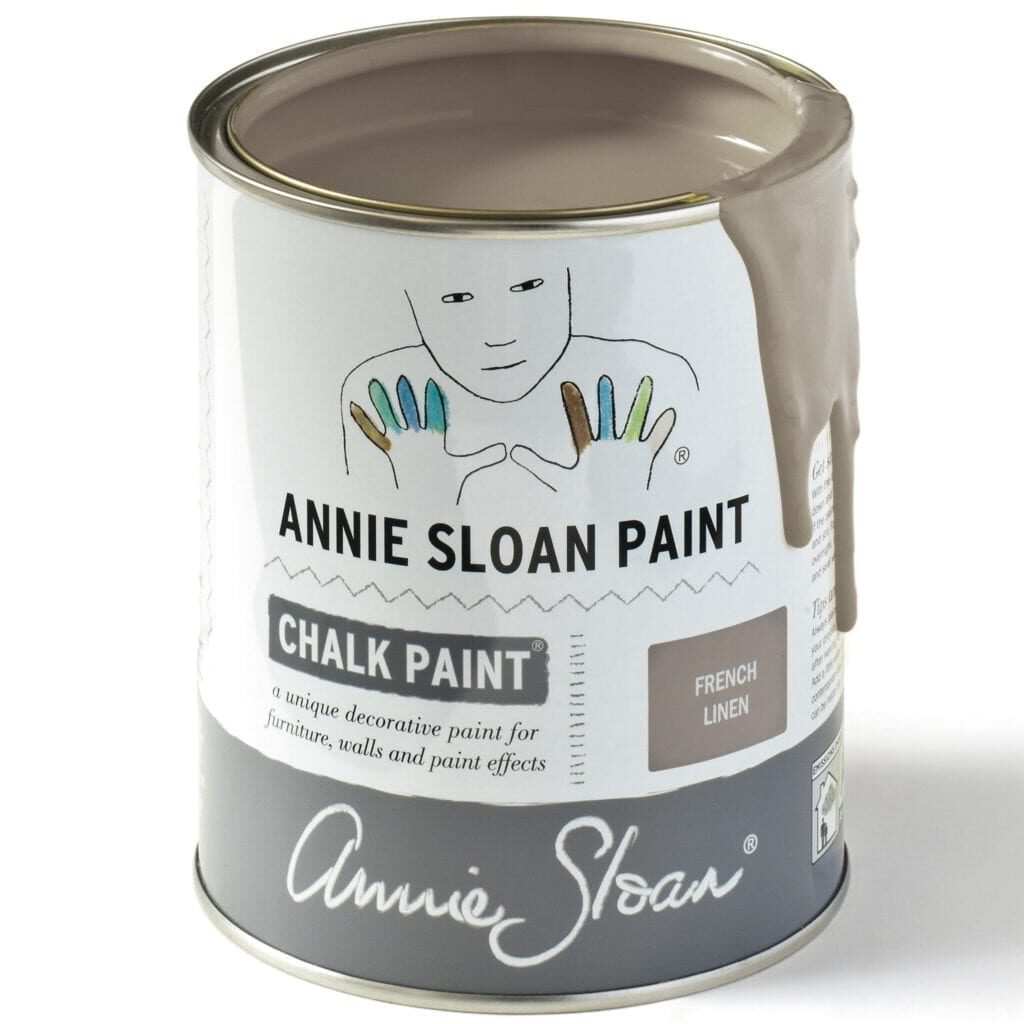
On her blog “Life on Virginia Street”, Sarah gray-washed her dark stone fireplace with chalk paint and it turned out fabulous! She mixed Annie Sloan’s French Linen 50/50 with water to create a thin paint solution that she brushed over all her stone. Read all about the process she used here: Life On Virginia Street
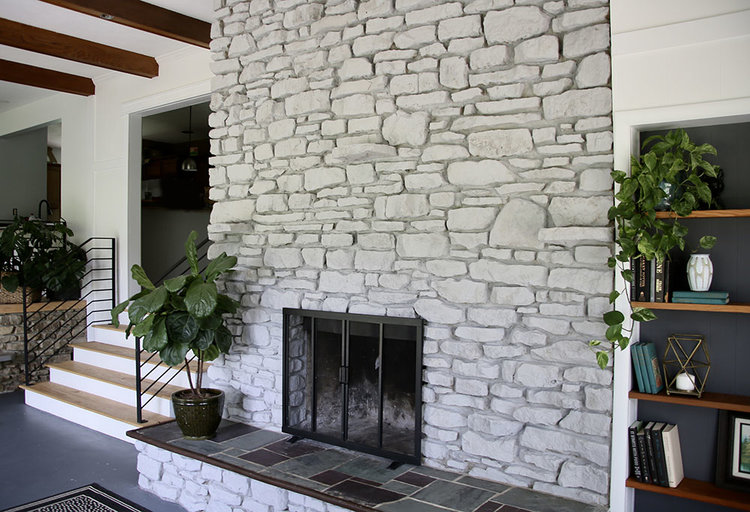
Here’s another example of gray-washed stone from Erin's Art and Gardens. Erin chalk-painted her outdated brown painted stone fireplace and what a difference it made in her room! Read all about her project here.
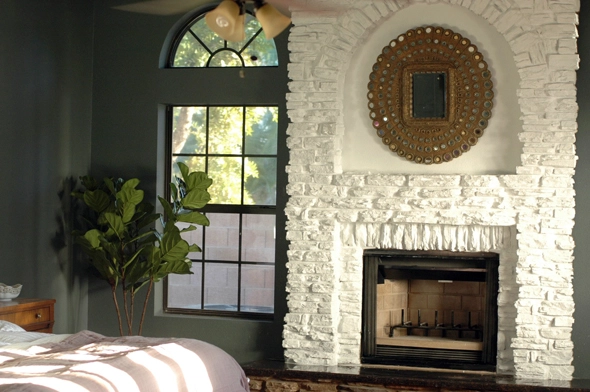
Even faux stone can be painted! Check out this faux stone fireplace makeover on the adorable website called Juniper Home. Jenny Komenda shares her design work and home products as well as her ideas and projects. Jenny painted the faux stone fireplace in her bedroom and transformed the dark looming structure into a lighter softer version. She simply brushed a white primer over the faux stone and the results speak for themselves!
If you're looking to start painting fireplace stone and you like the look of darker stone, you might be interested in staining your stone fireplace. If you already have dark stone on your fireplace, chances are staining the stone in another color will not work. Staining the stones only works if you have light-colored stones that will change color when the darker stain is applied. You can use concrete stain, available in various shades including browns and grays, to darken light-colored stones.
If you decide to stain your stone fireplace, be sure to go slowly, applying a single layer at a time and letting it dry for a few days so you can see the color before you paint on another layer, taking care not to get stain on the grout lines. If the stones aren’t as dark as you’d like, you can paint on another layer until you get the shade you prefer.
After you finish your painted stone fireplace project, you’ll see that the look and feel of your entire room are different. Lighter, brighter, and more open, your new fireplace may beg for a new set of doors or a new mantel to finish off its new look.
When considering how to update your stone fireplace and stone fireplace surround, think fresh, clean, and simple. Whether you purchase new fireplace doors and a new mantel or you decide to refurbish what you have with a little paint, it’s a great time to rethink putting up the same old accessories you’ve had in the past. The newly painted stone fireplace will likely make the mantel and doors stand out even more than before, so it’s important to make sure your fireplace doors and mantel look fresh and new. For example, if you have gold-colored brass doors, consider replacing them with solid black for a more updated look.
Yes, proper preparation when painting a stone fireplace is crucial for a successful job. Clean the stone surface thoroughly to remove any dirt, soot, or debris. You may need to use a scrub brush, mild detergent, and water to clean the surface effectively. Let it dry completely before applying the paint.
Consider the overall style and color scheme of the room. Neutral colors like white, beige, or gray are popular choices for a timeless and versatile look. However, you can also choose bolder colors to make the fireplace a focal point. Get paint samples and test them on a small area of the stone to see how they look in your space and lighting.
No, you should not paint the interior of the fireplace. The interior is exposed to extremely high temperatures, and regular paint will not withstand the heat. Painting fireplace stone interiors can also release harmful fumes when the fireplace is in use. Leave the interior unpainted or use a specific high-temperature fireplace paint made for the inside.
For some of us, we get a warm, cozy feeling when we think about our fireplace: Roasting marshmallows with the family. A glass of wine by the fire after a long day. Cozying up with a warm blanket and a book, watching the dancing flames.
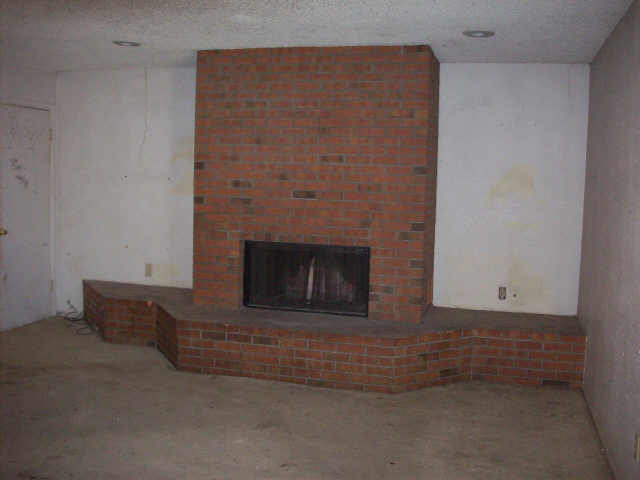
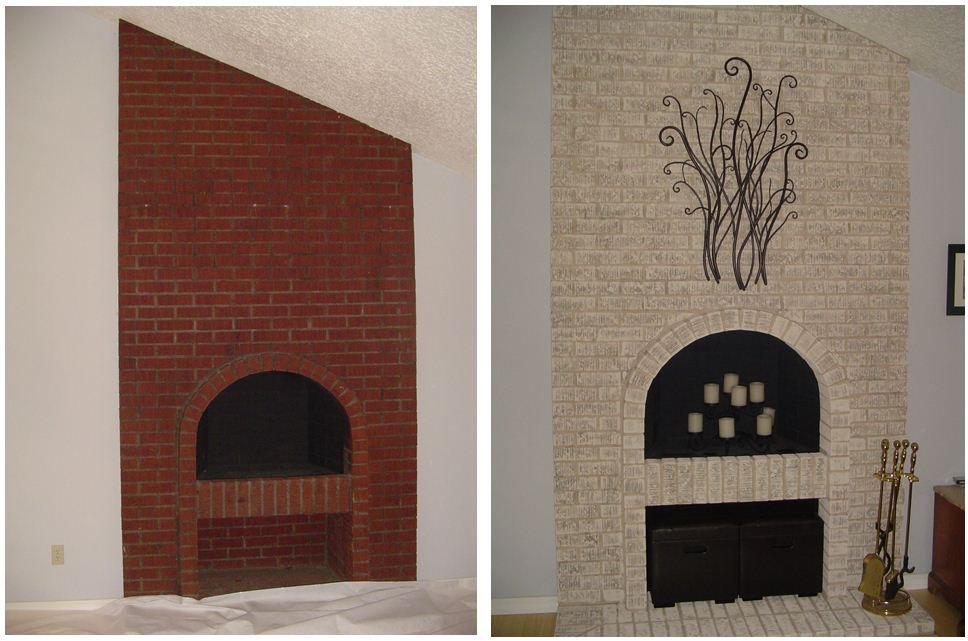
For others of us, when we think of our fireplace, we get a creepy, eerie feeling. That dark structure lurking in the corner of our living room has never been enjoyed by anyone. It’s just sitting there taking up space.
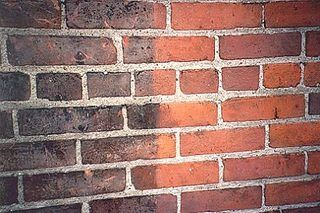
You’ve lived with that drab outdated brick for years, not knowing how to make it better. No matter how you’ve tried to decorate your room, there it is, heavy, dark, and looming.
That dingy “Brady Bunch brick” was groovy in the 1970s, but today, not so much. It’s time to get rid of that ugly brick once and for all and give your fireplace a facelift with paint!
Painting your brick or fireplace surround is a fast, easy way to get a fresh new look without breaking the bank. Whether your ugly, outdated brick is a wall in your kitchen or a fireplace in your living room, paint is just the thing to brighten that brick. It’s cheaper than any other remodeling option, and what have you got to lose by giving it a try? You can always choose another remodeling option if you don’t like your painted brick.
This three-part series gives you the rundown on fireplace painting options so you can find the best option for your brick. Part #2 talks about colors and techniques, and part #3 gives you step-by-step instructions. Check them out and get inspired to tackle that fireplace painting project you’ve put off for so long.
When you look at any remodeling project, you think seriously about it. Is it worth the time, money, and effort? Painting your old red brick can be done in just a day, sometimes a weekend if there is a lot of surface area. You can choose any paint color, and the starting cost of a project will be under $200, though, again, the size of your fireplace may drive the cost up some.
Even a $500 project will be far less than any resurfacing project. Those can cost upwards of $2000. The effort required depends on the method you choose. Most methods are easy for DIYers of any level.Although it may seem like a huge project, painting your fireplace doesn’t take that long compared to other more complicated and expensive home improvement projects.
A fresh coat of paint can really live you a lot of bang for your buck. The key idea is: if your brick is ugly and outdated, no matter how you try, you can’t really improve it unless you remodel with paint, hire a contractor to reface with a different material, or tear it out and rebuild it with a different color brick. Refacing and rebuilding are quite expensive, so we recommend trying the paint first. If you hate it, you can still turn to those other options, but thousands of homeowners have fallen in love with their painted fireplaces. You can too.
Removing paint from brick can be tedious and time consuming. It’s not an easy task. A better option is to paint over the painted brick with a different color or use the Brick-Anew Paint Kit. This paint kit doesn’t give a flat look like most paint. A fireplace painted with Brick-Anew doesn’t look like it’s been painted at all; it looks like it’s been rebuilt with new brick. So if you hate that solid white, the Brick-Anew paint kit is an easy way to get that real brick look back without the hassle of removing the paint.
If you decide that taking off the paint is the best option, here are a few guidelines and a step-by-step process.
Especially if you have a large amount of brick, you may want to hire a professional. The process requires a lot of time and effort. This isn’t a project you’ll want to take a break from and leave half done since it requires a lot of prep before you start working and will look quite odd half-finished.
Try and find paint stripping products that don’t have harsh fumes. Look for gel and paste compounds and fabric based peeling strips.
These processes can damage the surface of your brick.
Materials
Steps
Feeling inspired yet? Painting your brick is quick, easy, and inexpensive. If you don’t like it, you can always try another color or turn to a resurfacing or rebuilding option. But we doubt it’ll come to that. See you in part #2!
When choosing a paint color for your brick fireplace, it’s easy to get overwhelmed with choices. Choosing the right color reflects your personal style and your room’s personality. Think of the mood you want to project. Whether you want to create a tranquil sanctuary or make a dramatic statement, paint colors can make all the difference in the look and feel you’re trying to create.
Let’s take a look at some of the best painted brick fireplace color choices from bold and dramatic to light and airy to natural and authentic:
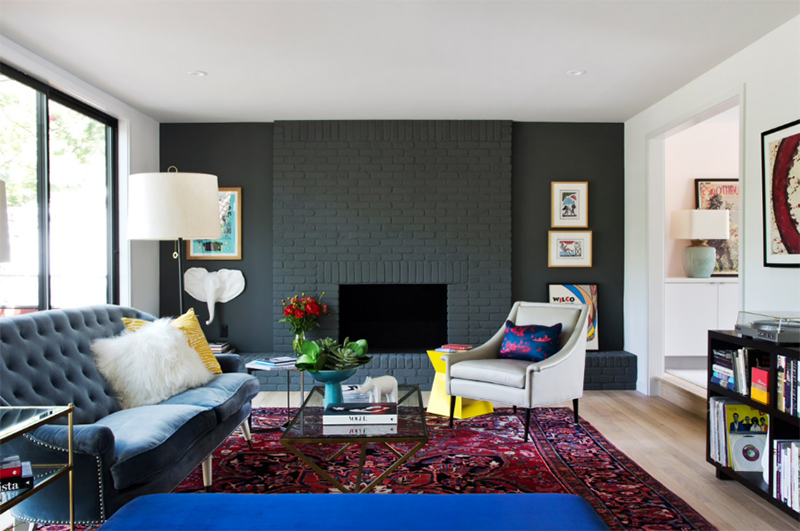
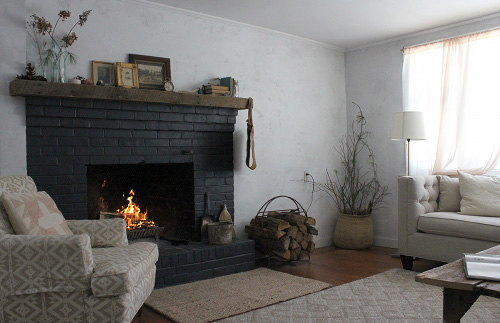
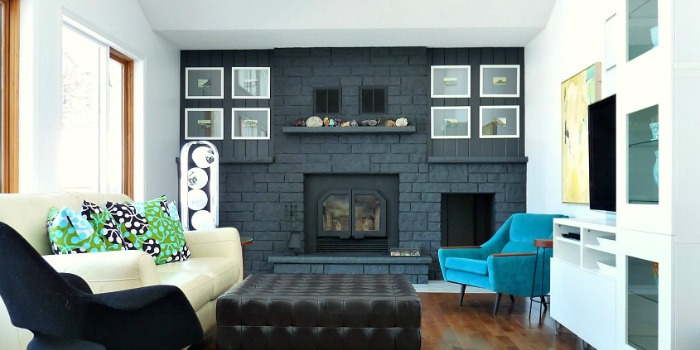
Ask yourself, “Do I want my fireplace to stand out or blend in with the room?” The color paint you choose will determine how much your fireplace becomes the focal point in your room. Dark colors will draw attention and create drama. If you want your fireplace to be the focal point in the room, a pop of color will draw attention to that area of your room.
Shades of white and off-white create a calm neutral look on brick fireplaces. Tan, beige, cream, and light gray blend in for a natural look. Soft shades of black and gray work well with contemporary-style rooms. Whitewashing, painting a solid light neutral color, or using a product such as Brick-Anew to create a “real brick” look will blend in with any decor. Check out the Brick-Anew process to choose fireplace paint colors.
Painting the fireplace brick a darker color with light-colored walls can create an interesting contrast. You can also create a contrast by painting the brick and the mantel different shades.
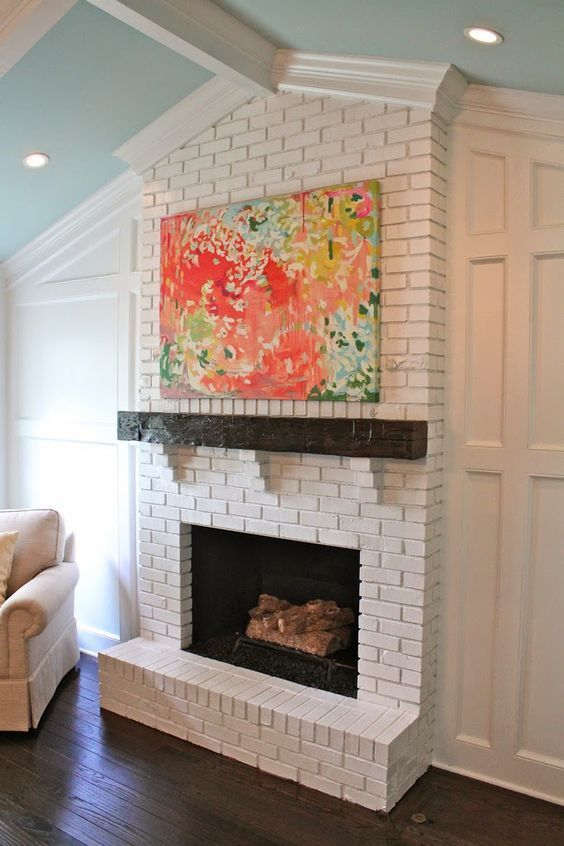
For example, a white-painted brick with a black mantel makes a bold statement.
If you want the fireplace to blend in completely with the room, try painting the walls and the fireplace brick the same or similar colors. Soft, light shades create a calm, serene atmosphere in the room and downplay the fireplace as the focal point in the room.
Listed below are some products that you look through in order to help choose the best color to paint your brick fireplace:


Hi welcome back to part #2 of our Fireplace Painting Guide. You can access part #1 here. Fireplace painting is a super easy and affordable way to radically update your family room. In this article, we’ll be talking some specifics about paint type, color choice, and technique.
If you plan to paint your fireplace brick one solid color, an indoor latex paint in flat, semi-gloss, or gloss can be used on the areas of the fireplace facing and fireplace surrounds. You can choose from a variety of colors depending on the look you’re trying to achieve. Darker shades give a more dramatic look while lighter shades look more neutral. Another option if you don’t want a solid painted look is the Brick-Anew Paint Kit. This kit is a latex-based product that contains several different shades of paint that work together to give you the look of real brick. All materials are included in this easy, DIY kit.
The ledge in front of the firebox can be painted with an indoor latex paint. You might want to paint one or two coats of clear polyurethane to protect your painted surface since the hearth is the place where wood is stacked, fireplace dolls are place, and where some people will sit by the fire.
The firebox is the area of the fireplace where the fire burns. Because of the unsightly soot that stains the firebox, painting the firebox black can hide the stains and give the fireplace a fresher, cleaner look. In a prefab fireplace, the firebox is a metal insert made to look like brick. In a masonry fireplace, the firebox is built from actual brick or stone.
This area gets extremely hot so a high-temperature paint is necessary. We recommend a paint that can withstand temperatures up to 1200 degrees Fahrenheit. There are a variety of high-temp paint colors. From black to almond to dark green, you can find a color for every decor.
The mantel shelf is sometimes made from the same brick as the fireplace. Other types of mantels include wooden shelves and surrounds. Wood or brick mantels can be painted much the same way as the fireplace brick. Of course, the wood will need to be sanded and primed before painting.
Many older fireplaces have dated brass fireplace doors. Many people would like to paint these when they paint their fireplace. This is possible, but typically the time and expense taking apart, prepping, and painting the doors is more expensive than simply buying some new fireplace doors. Should you choose to paint them, the fireplace door frame can be painted with the same high-temperature paint as the firebox.
Sorry, you shouldn’t paint your gas logs. However, oftentimes a good clean is all it takes to really update those fireplace logs.
When choosing the right fireplace paint color and technique for your brick, it’s easy to get overwhelmed with choices. Choosing the right color reflects your personal style and your room’s personality. Think of the mood you want to project. Whether you want to create a tranquil sanctuary or make a dramatic statement, paint colors can make all the difference in the look and feel you’re trying to create. Let’s take a look at some painted brick color choices from bold to cool to naturally authentic.
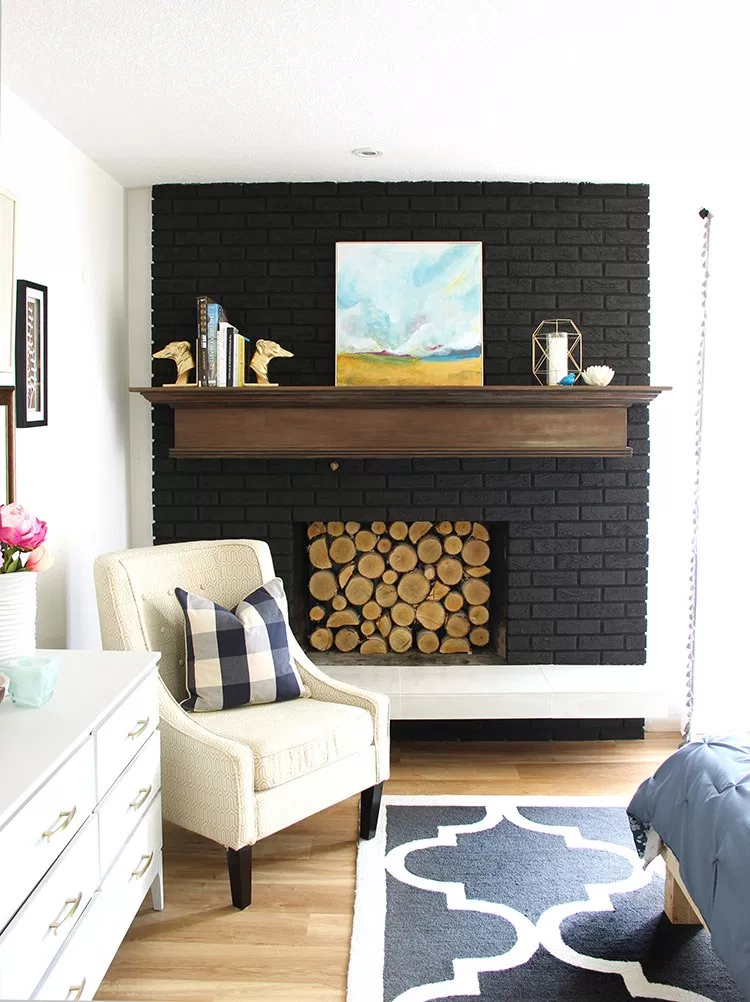
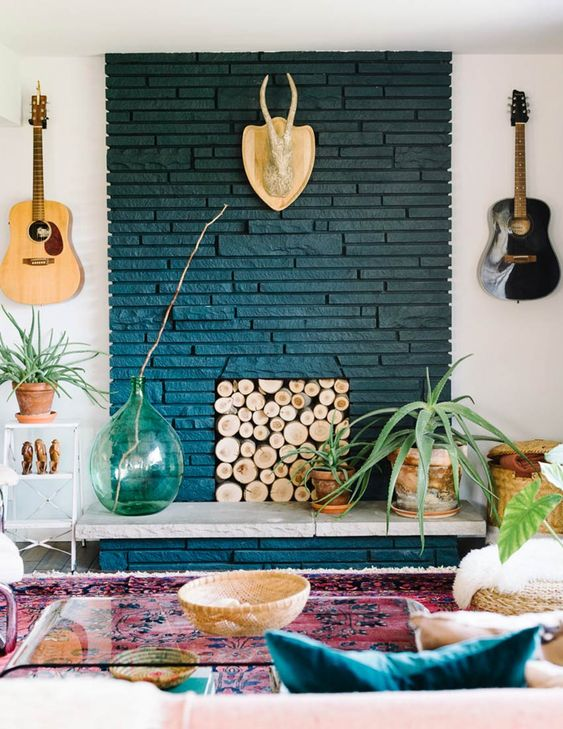
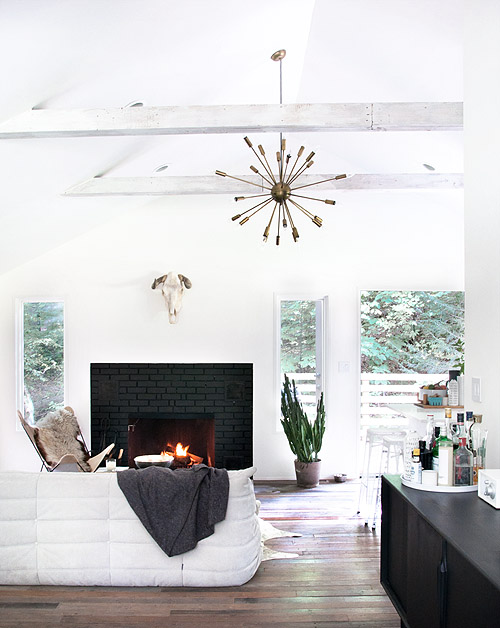
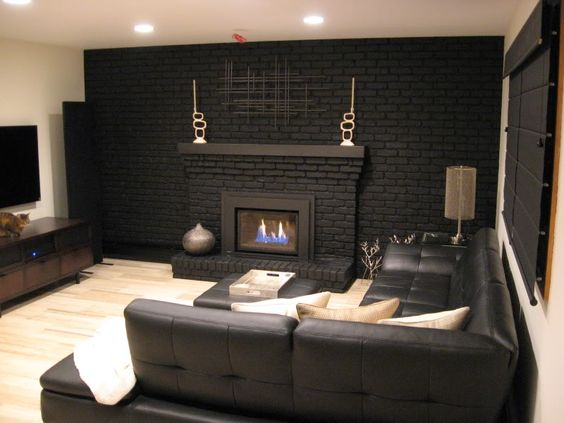
Painting your fireplace a darker or vibrant color is adds flare to your living room. It is immediately eye-catching, especially if the walls are painted a lighter color. Black fireplace paint is especially popular.

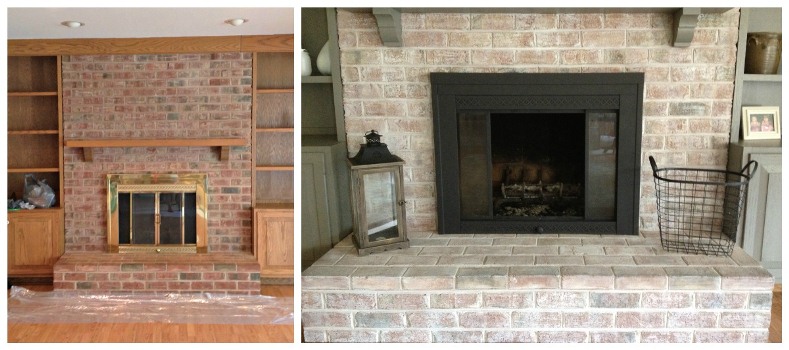
This may be surprising, but you can actually paint a brick fireplace to make it look like a new color of brick. The Brick-Anew Paint Kit is a one of a kind DIY project. It comes with instructions, brick fireplace paint, and all the tools you need to paint your fireplace to look like new, lighter brick. This is also a great technique to use if you have a full brick wall in your home.

This technique adds class to your brick by making it look a bit older. It lightens up the room while preserving some of the red colors of the brick. Once its done you can use your interior designer skills to add your own style.
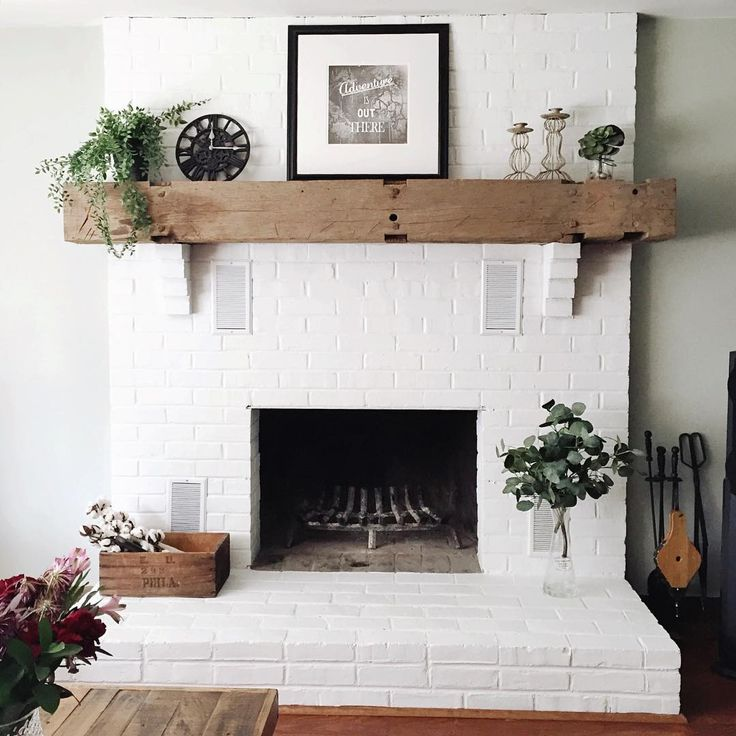
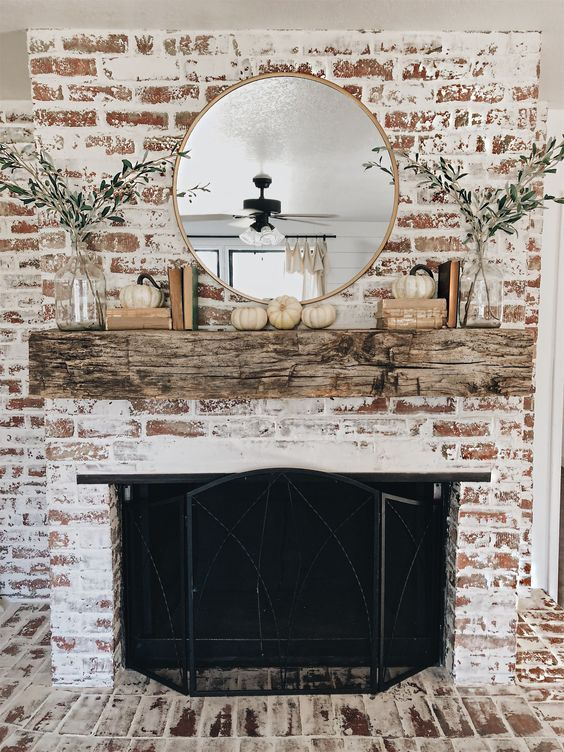
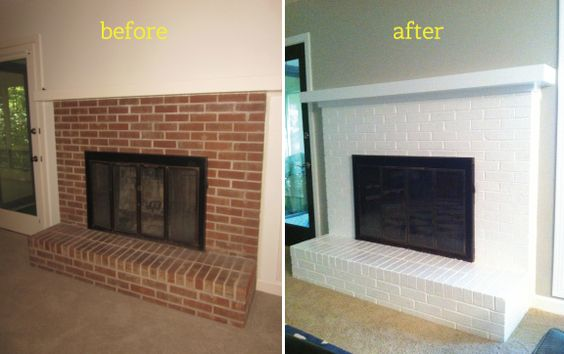
White fireplace paint is a super popular right now. A white fireplace adds brightness and a light-weight feel to the room. This look is especially nice with a natural wood mantel.
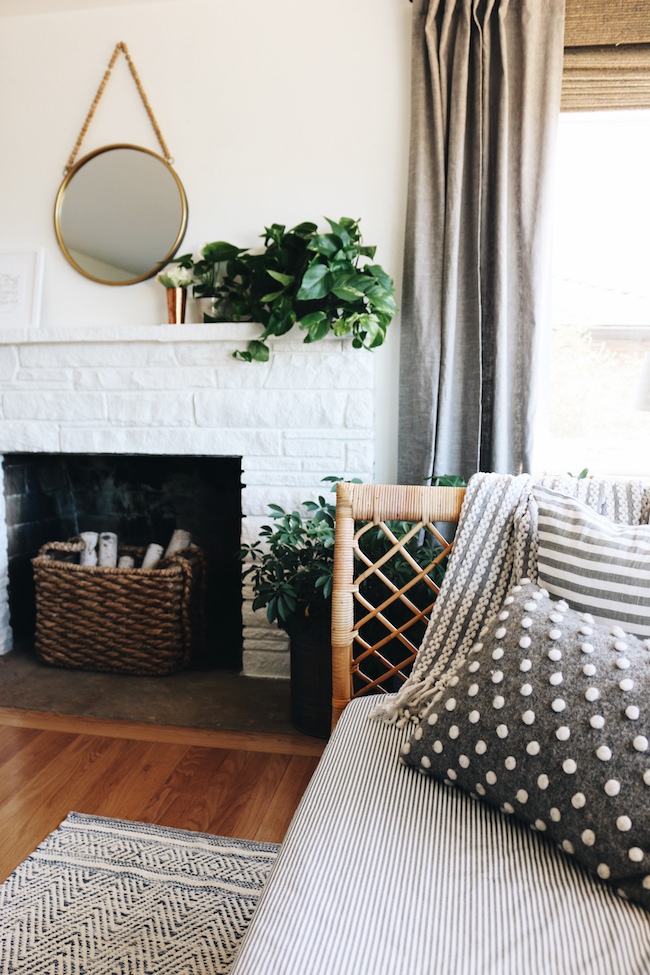
This is probably the easiest of the fireplace makeovers. Whitewash is similar to German schmear in that the white brightens the room, but some of the original brick still peaks through the white. But whitewashing and German schmear have two distinct characters. Whitewashing offers a creamy sort-of natural look.
From light gray to creamy tan, using a neutral color gives a dreamy feel to your room.
Staining your brick is another way to get a natural look. Using brick stain is great for going from a light brick to a darker brick. Be sure to use your drop cloth to protect your floors and furniture! Stain can be hard to get off.

This decision can be scary. If you read part #1, you know that removing paint from brick can be a time-consuming process. Try to relax and remember that you can always paint over the brick again if you hate it. Paint is pretty cheap, so you could even paint your brick every couple of years, just to keep things fresh.
Ask yourself: "Do I want my fireplace to stand out or blend into the rest of the room?" The color and technique you choose determines how much the fireplace stands out or blends in. Do you want to:
Whitewashing has a calming effect and really blends in with the rest of the decor. This is because it diminishes or "mutes" the red tones in your brick. Using one of the three Brick-Anew colors that best matches the color on your walls also allows the fireplace to blend in while keeping a natural brick look.
If your walls are a light color, painting your fireplace brick a dark or vibrant color creates an interesting contrast. Or you could stain the fireplace brick in rich dark tones. German schmear creates a nice contrast between the white paint and the dark brick underneath. Painting the mantel or surround is another easy way to create contrast. White brick with a black mantel is a bold contrast.
If you really want your fireplace to blend in, try painting it the same color as the walls. Or consider painting it a similar shade to the rest of the furniture. Creamy and muted colors like grey and beige look great on brick, and matching colors makes your decor look planned and cohesive. This does take an emphasis off the fireplace as the focal point of the room.
Those are some broad tips to get you thinking about what styles are important to you. Here are some Quick Tips that provide more specific advice:
If your space has bold colors and textures, paint your brick black.
If your space has modern greyscale tones, paint your brick a vibrant color.
If your space has an eclectic, timeless feel, paint your brick using German schmear.
If your space is vintage and chic, paint your brick using whitewash.
If your space has a relaxed, laid-back vibe, paint your brick a solid neutral color.
If your space is elegant and formal, paint your brick using stain.
The Brick-Anew natural-look Paint Kit has three different color choices and works with just about any space.

Each of the methods listed above gives fantastic results so just think about what's important to you and your decor. Whatever you choose, you'll have a beautiful updated fireplace for a fraction of the cost of resurfacing or rebuilding. In part #3 I'll give step-by-step instructions for each of the methods above. See you then!
Cleaning a brick fireplace can seem like a daunting task, but with the right supplies and steps, you can restore its natural beauty and ensure it remains functional for years to come. Whether you're preparing for a cozy winter fire or just looking to freshen up your space, follow these simple steps to learn how to clean a brick fireplace.
Cleaning fireplace brick can be done in a just a few hours with some elbow grease and determination. Your fireplace cleaning cost will be much less if you decide to do it yourself instead of hiring a handyman and you probably already have most of the materials you’ll need in your garage.
Tools and Materials you'll need:
Start by clearing the area around the fireplace. Lay down a drop cloth or tarp to catch any debris, dust, or cleaning solution. Make sure to remove any furniture or rugs near the fireplace that could be damaged during the process. If there’s any soot buildup inside the fireplace, sweep it out using a broom or vacuum with a hose attachment to remove as much debris as possible.
To clean the brick surface effectively, you’ll need to mix a cleaning solution. In a bucket, combine warm water with a small amount of mild dish soap, or for tougher grime, use a fireplace-specific cleaner. If you prefer a more natural solution, mix equal parts white vinegar and water. This vinegar mixture is great for tackling stubborn stains or soot buildup without using harsh chemicals.
Once your cleaning solution is ready, dip a scrub brush or sponge into the mixture and begin applying it to the brick surface. Work in small sections to ensure thorough coverage. Be sure to focus on areas with visible soot, stains, or grease. If the fireplace has significant buildup, you might need to apply the solution multiple times. Let it sit for a few minutes to allow the solution to break down the grime before scrubbing.
After applying the solution, use a stiff-bristled brush to scrub the brick surface. Use circular motions and a little elbow grease to loosen up the dirt, soot, and stains. For areas with deeper stains, you may need to apply extra pressure. Be gentle, though, as you don't want to damage the brick surface.
Once you’ve scrubbed the entire fireplace, it’s time to rinse away the cleaning solution. Dip a sponge or rag into clean water and wipe down the bricks, removing any excess soap or cleaner. You may need to rinse the rag frequently to ensure you’re not spreading dirt back onto the surface. Make sure to remove all cleaning residues to avoid any leftover streaks or stains.
Finally, use an old towel or a clean cloth to dry the surface. This will help prevent water from seeping into the mortar between the bricks and causing potential damage. Allow the fireplace to air dry completely before lighting a fire. You can also leave the door open for some extra ventilation.
It’s a good idea to clean your fireplace at least once a year. If you use it regularly, more frequent cleaning may be necessary to prevent soot buildup and maintain the brick’s appearance.
While a pressure washer can clean the exterior of a brick fireplace, it’s not recommended for the interior. The high-pressure water may damage the bricks or mortar. Stick to manual cleaning for interior surfaces.
For stubborn stains, try using a stronger solution, such as a paste made from baking soda and water. Apply it to the stains and let it sit before scrubbing. If stains persist, consider contacting a professional cleaning service.
Now that you know how to clean a fireplace, there’s no excuses for not getting to work making that old fireplace look new. So what type of paint should you choose?
There are a number of different types of paint you can use depending on the look you’re trying to achieve. We would advise looking into the Brick-Anew brick paint kit to get an idea of which paint you prefer.
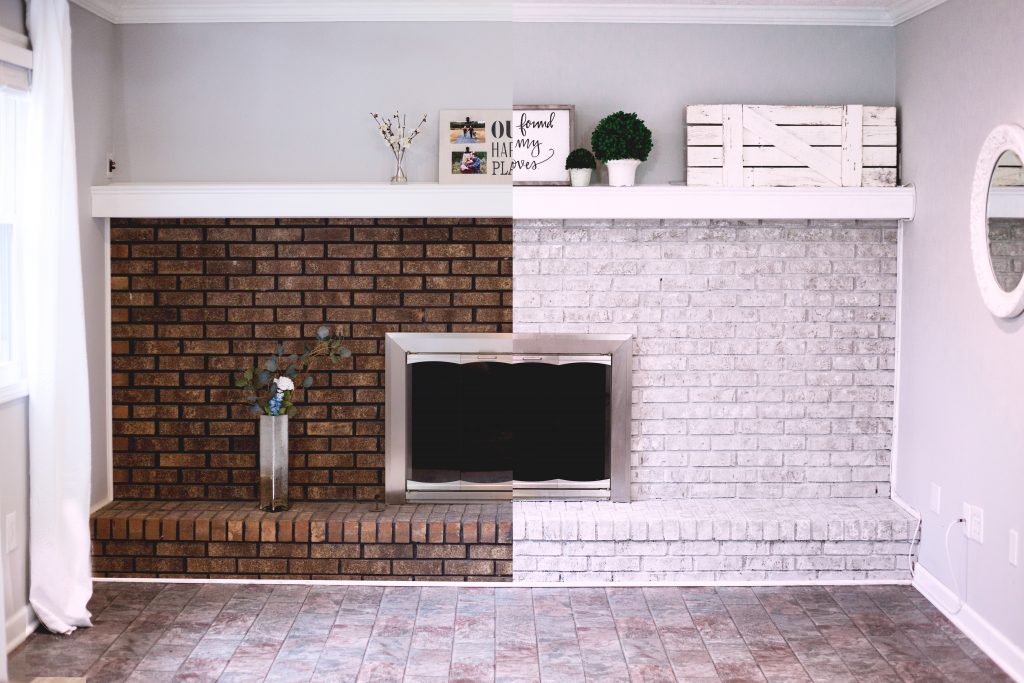
Dull, dark outdated brick can ruin the look of your entire room. With the recent trend of light, bright and white decorating, there’s no room for a bright red brick wall or a dark brown brick fireplace from the 1970’s.
So what’s a homeowner to do? Tear down the offending structure and spend thousands of dollars in the process? Not necessarily. There’s a less expensive option that will cover up the brick and give new life to your room. Perhaps you’ve heard of it. It’s called “whitewashing”.
Whitewashing a brick fireplace involves applying a thin coat of white paint mixed with water all over your brick to tone down the dark color and create a lighter, softer look. The technique, relatively inexpensive and not too time-consuming, requires little expertise so even the least experienced DIY’er can tackle the project and feel confident the results will be perfect.
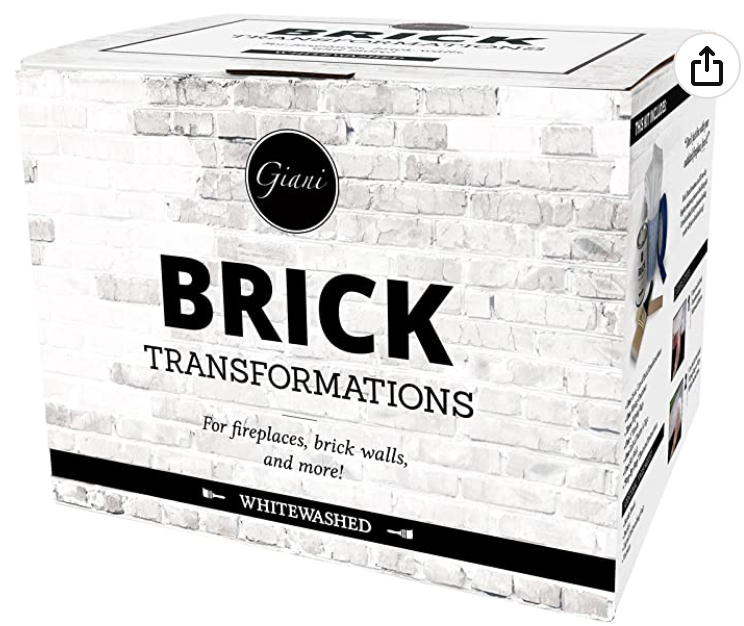
Looking for the right product to start your whitewashing makeover? Our favorite is the Giani Brick Transformations Paint Kit. This product is affordable and get's the job done with little hassle.
Bricka fireplace whitewashing is a straightforward process, but the approach varies depending on whether the brick has been previously painted or is still in its natural state. Follow the correct set of instructions for your situation.
Before starting, gather the necessary supplies to ensure a smooth process:
If your brick fireplace has already been painted, the process differs slightly since the brick’s porous surface is sealed. Here’s how to whitewash a painted brick fireplace:
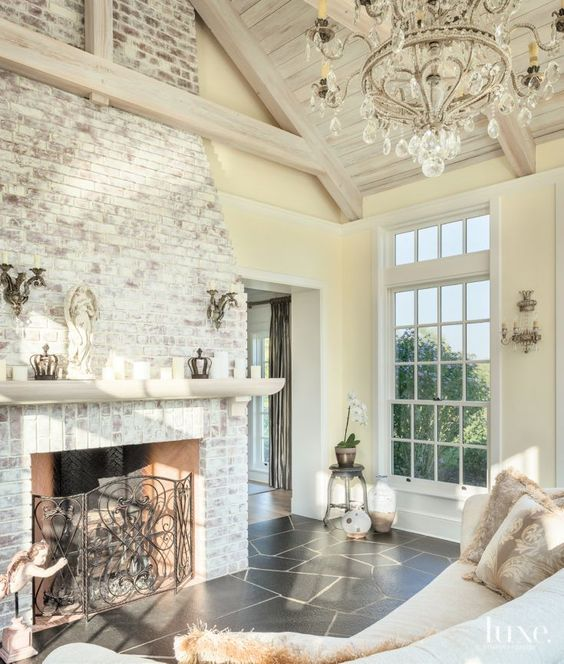
Whitewashing a brick fireplace is one of the easiest ways to modernize your space without completely covering the character of the brick. It lightens the room, creates a fresh and airy feel, and blends seamlessly with various interior styles—from rustic to contemporary. Unlike painting, which can look flat and uniform, whitewashing enhances the brick’s texture while toning down overly dark or dated hues.
Another major advantage is that whitewashing is a low-commitment update. Since the paint is diluted, it’s less opaque than a full coat, making it easier to tweak or even remove in the future if your style preferences change.
 Instagram Twitter LinkedIn