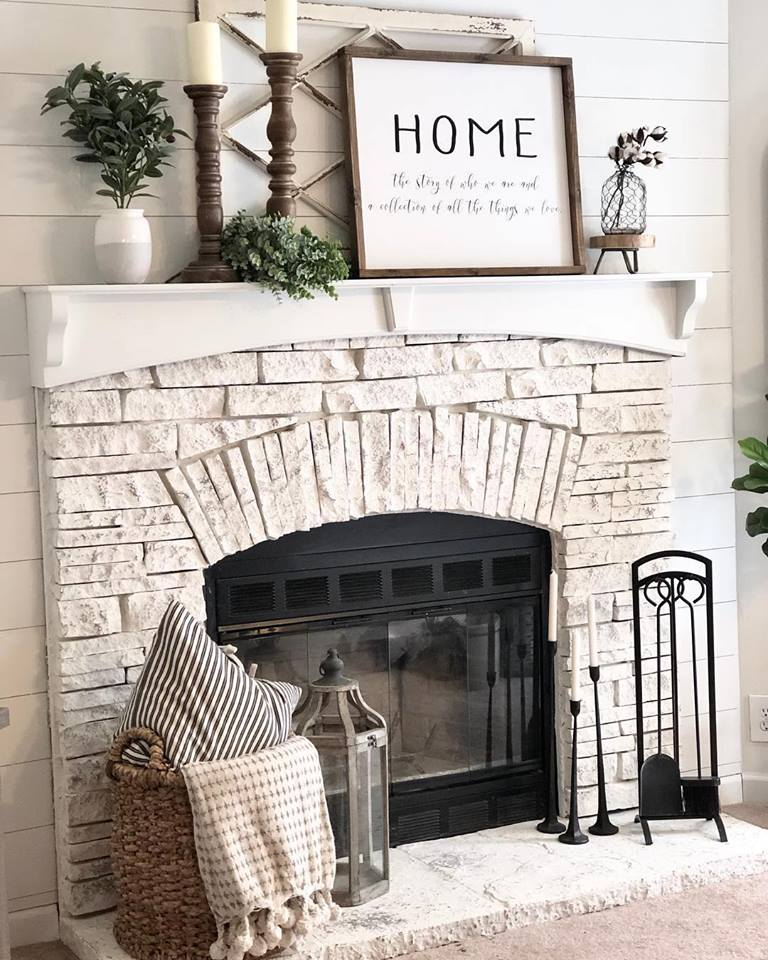
For some of us, we get a warm cozy feeling when we think about our fireplace.
Roasting marshmallows with the family. A glass of wine by the fire after a long day. Cozying up with a warm blanket and a book, watching the dancing flames. For others, we get a creepy eerie feeling thinking of the dark structure lurking in the corner of our living room. Never enjoyed by anyone. Just sitting there taking up space.
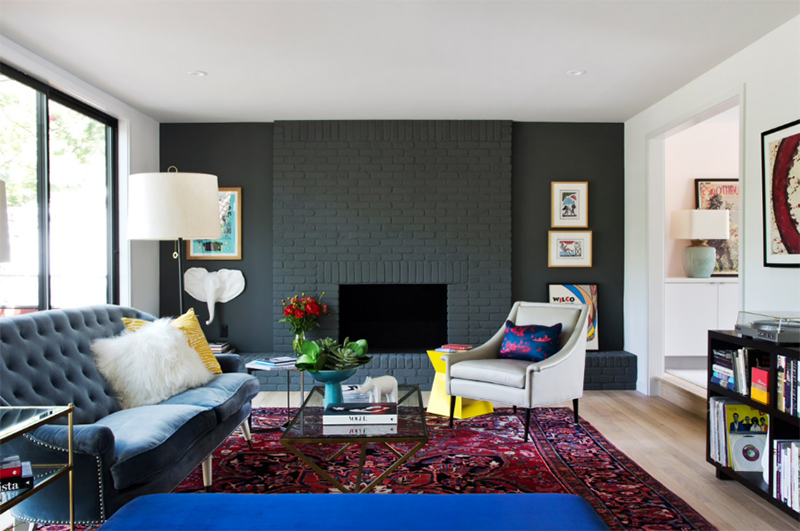
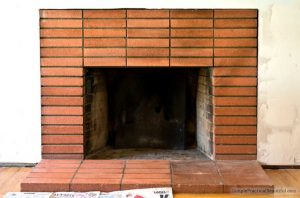
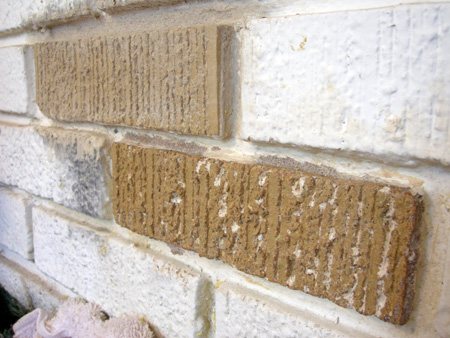
You’ve lived with that drab outdated brick for years, not knowing how to make it better. No matter how you’ve tried to decorate your room...there it is. Heavy. Looming. Depressing.
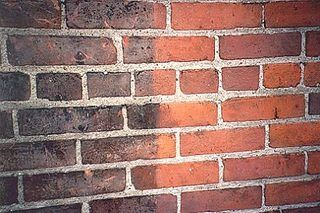
That dingy “Brady Bunch Brick” was groovy in the 1970’s...

But today...not so much. It’s time to consider getting rid of that ugly brick once and for all and give your fireplace a facelift with -
You guessed it... paint!
Painting your brick is a fast, easy way to get a fresh new look without ruining your budget. Whether your ugly outdated brick is a wall in your kitchen or a fireplace in the middle of your living room, paint can be just the thing for a quick facelift. It’s cheaper than any other remodeling option and what have you got to lose by giving it a try? You can always choose another remodeling option if you don’t like the painted look.
Still not convinced? Read on and maybe you’ll be inspired to tackle that fireplace painting project you’ve put off for so long.
Why Paint Your Brick Fireplace?
Are you asking yourself, “Why in the world should I paint my brick fireplace?” Here are some reasons to help you think through your decision:
1. Painting your brick is quick, easy and you get immediate results.
Even if you’re not a DIY pro, painting brick is not a project that requires a lot of skill. Grab a paintbrush and a can of paint and you’re off and running. If you’re in a hurry to complete the project, painting a brick fireplace can be done pretty quickly unless your brick wall or fireplace is extremely large. Even then, it shouldn’t take more than a couple of days to finish. Depending on what kind of paint project you decide on (there are several options), you might need additional materials, but we’ll get to that a little later. As soon as you start applying the paint to your brick, you’ll see immediate results. That feeling of “Why didn’t I do this a long time ago?!? There’s something satisfying about the immediate gratification you feel about covering up ugly brick that just makes you smile.
2. You can do it yourself without having to hire a contractor.
Painting your brick is a project you can do yourself without having to hire expensive contractors.
Professionals could charge anywhere from $500 - $2000, depending on the complexity of the project. But this article is here to show you that paying a professional to paint your brick is so unnecessary because the project is so simple. With the proper tools and paint, it’s possible to make your fireplace look as if it was painted by a professional while spending less than a quarter of a contractor’s price.
3. It’s inexpensive compared to other options like tearing out the brick or resurfacing with another material like tile, granite, or stone.
There are many options to choose from when trying to decide how to remodel your brick fireplace. One option is to tear out the entire fireplace and rebuild it with a new color brick. Other materials you could use to rebuild or resurface your fireplace include:
- Stacked stone
- Marble
- Stucco
- Sheetrock
- Granite
- Wood
- Metal
These remodeling options would require hiring a contractor unless you have some pretty good construction skills. The cost on these projects ranges from $3,000 to $8,000.
http://www.fireplace-decorating.com/
4. You can always try painting your brick fireplace first since it’s the easiest and cheapest remodeling option and go to “plan B” if you decide you don’t like the finished look.
The great thing about painting your fireplace is that it is an easy, “do it yourself” project that leaves your fireplace looking like a professional worked on it. The paint is a reasonable price and the small number of tools that you need will allow you to keep a low budget. Unlike rebricking, painting your fireplace is never permanent. After you finish painting and contouring your fireplace and you’ve found that you chose the wrong color or you don’t like the overall look, you can always paint over it with a new color!
5. Painting your brick fireplace can increase the sales value of your home. If you’re trying to sell your house and need to update your fireplace, paint is a “quick fix” that gives you a lot of bang for your buck.
Most people don’t realize that the simple change of painting your fireplace, you can increase the sales value of your home. As the focal point of a room, fireplaces either add to or take away from the entire atmosphere of a room. Painting the brick transforms a room from being dark and grim to bright and modern. Below you’ll find help on how to choose a paint and color that’s perfect for your room as well as a step by step description on how to paint your fireplace. This project will not disappoint when you’re trying to modernize your home and get the sales value it deserves.
6. Enjoy your home and your fireplace. Why let an ugly fireplace ruin the look of your room? You deserve a beautiful spot to unwind after a long day.
The best part of coming home after a day at work is lounging on the couch with either a good book, a glass of wine, or your favorite TV show. During your few hours of relaxation, the last thing you want on your mind is how ugly your fireplace looks. By painting your brick fireplace, you create a new ambiance for your room - warm, cozy, and appealing.
What’s the return on your investment after painting your brick fireplace?
When you look at any remodeling project over $500, most people think seriously about it, especially if it’s a cosmetic upgrade. This brings up the question, “Is painting my fireplace worth the time, money, and effort?” In my opinion, the answer is a hands down, “ Yes!”. Although it seems like a huge project, painting your fireplace doesn’t take that long compared to other more complicated and expensive home improvement projects and a fresh coat of paint can really give you a lot of “bang for your buck”. The key idea is: If your brick is ugly and outdated, no matter how you try, you can’t make it look a whole lot different unless you remodel with paint or hire a contractor to reface with a different material such as granite, slate, stone, tile, or sheetrock. Another option is to tear out the entire fireplace and rebuild it with a different color brick.
https://www.paintedbykaylapayne.com/2016/05/17/how-to-paint-brick-fireplace/
http://www.fireplace-decorating.com/2008/03/why-paint-brick-fireplace.html
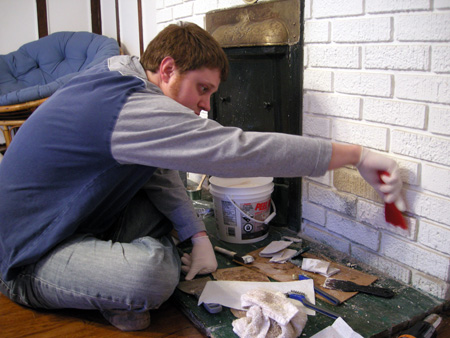
Can Old Paint be Removed from Brick?
Removing paint from your brick fireplace can be tedious and time consuming. It’s not an easy task to remove paint from brick. The only reason I can think of where this process would be a good idea is if there was antique brick underneath the paint that was over a hundred years old. Antique brick is beautiful and, in my opinion, should never be painted.
An easier solution would be to paint over the painted brick with a different color or use a product such as the Brick-Anew Paint Kit to get a “real brick” look instead of a painted look. If you decide that taking paint off your brick is what you need to do, here are some general guidelines:
- If you have a large amount of brick, you might want to hire a professional since the process requires so much time and effort.
- If you have only a small amount of brick, you can do the project yourself. Try to find some Paint Stripping products that don’t have such harsh fumes as some from the past. Try not to be tempted to sandblast the brick or apply a heavy-duty power wash to the brick since it might damage the bricks’ surface. There are gel and paste compounds that are excellent for removing old paint. Fabric based peeling strips can help as well. One product I’ve seen called Strip Away looks like it can do a pretty good job.
Materials:
- Peeling Strips
- Sturdy Scrub Brush
- Protective Goggles
- Gloves
- Drop Cloth
- Towel
1. Apply stripping agent
First, apply a stripping agent. You might want to start in a inconspicuous area before you apply the agent all over the brick. You will be able to see how well it works and get a good idea of about how much time your project will take.
2. Lay down drop cloth
Next, prepare your area by laying down a drop cloth and taping it to the area around the brick. As you scrape the paint off the bricks,you will make a mess so be sure to cover any area you want to be protected during the process.
3. Scrape off loose paint
Then, make sure you have on your goggles and gloves and begin scraping off any loose paint.
4. Apply stripping compound
Apply the stripping compound to the bricks.
5. Apply peeling strips
After the compound has been applied, get the peeling strips and start positioning them on the bricks by pressing them down into place. Overlap the strips to cover all the brick. Let the strips set according to the manufacturer’s instructions. Remember to be patient since it sometimes takes up to an entire day for the strips to work.
6. Remove peeling strips
After enough time has passed, begin lifting the strips. As you carefully peel off each strip, the paint beneath should come off with the strip.
7. Remove leftover paint
Use either the scrub brush or the trowel to remove any leftover paint or residue after the strip has been removed. Rinse the brick with water.
https://www.saltandrook.com/blog/2017/1/20/up-first-stripping-paint-off-a-fireplace
What Type Paints Should be Used for Different Parts of the Fireplace?
https://seekinglavenderlane.com/vintage-cottage-living-room-makeover/
- Fireplace Facing / Shelf/ Mantel - If you plan to paint your fireplace brick one solid color, an indoor latex paint in flat, semi-gloss or gloss can be used on the areas of the fireplace facing and surround. You can choose from a variety of colors depending on the look you’re trying to achieve. Darker shades give a more dramatic look while lighter shades look more neutral. Another option if you don’t want a solid painted look is the Brick-Anew Paint Kit. This kit is a latex based product that contains several different shades of paint that work together to give you the look of real brick. All materials are included in this easy DIY kit.
- Hearth - The ledge in front of the firebox can be painted with an indoor latex paint. You might want to paint one or two coats of clear polyurethane to protect your painted surface since the hearth in the place where wood is stacked, fireplace tools are placed, and some people like to sit by the fire.
- Firebox - The firebox is the area of the fireplace where the fire burns. Because of the unsightly soot stains in the firebox, painting the firebox black can hide the stains and give the fireplace a fresher, cleaner look. The firebox is a metal insert on a prefab zero clearance fireplace and made of brick on a masonry fireplace. This area gets extremely hot so a high temperature paint is necessary that will withstand temperatures up to 1200 degrees Fahrenheit. There are a variety of high temp paint colors besides black if you prefer a different look. From almond to dark green, you can find a color for every decor.
- Mantel – The mantel shelf is sometimes made from the same brick as the fireplace. Other types of mantels include wooden shelves and surrounds. Wood or brick mantels can be painted much the same way as the fireplace brick. Of course, the wood will need to be sanded and primed before painting.
- Fireplace Doors - Many older fireplaces have dated brass fireplace doors. Many people would like to paint these to update them when they paint their fireplace. This is possible, but typically the time and expense taking apart the doors, prepping the doors and then painting the doors is more expensive than simply buying some new fireplace doors. The fireplace door frame can be painted with high temperature grill and stove paint.
- Gas Logs - Unfortunately you can’t paint gas logs but you can clean them!
What Color Should You Paint Your Brick Fireplace?
When choosing a paint color for your brick, it’s easy to get overwhelmed with choices. Choosing the right color reflects your personal style and your room’s personality. Think of the mood you want to project. Whether you want to create a tranquil sanctuary or make a dramatic statement, paint colors can make all the difference in the look and feel you’re trying to create.
Let’s take a look at some painted brick color choices from bold and dramatic to light and airy to natural and authentic.
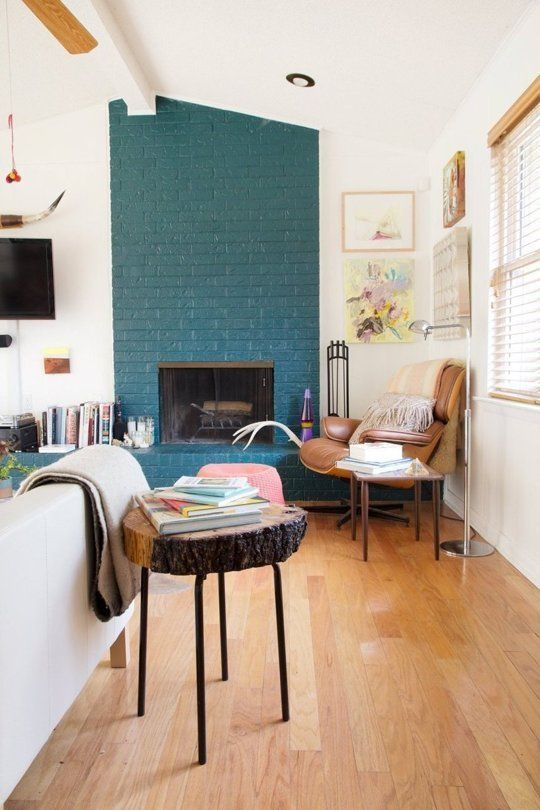
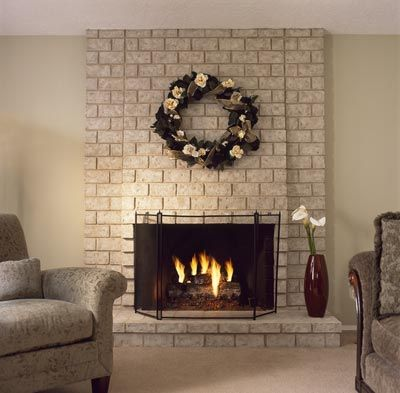
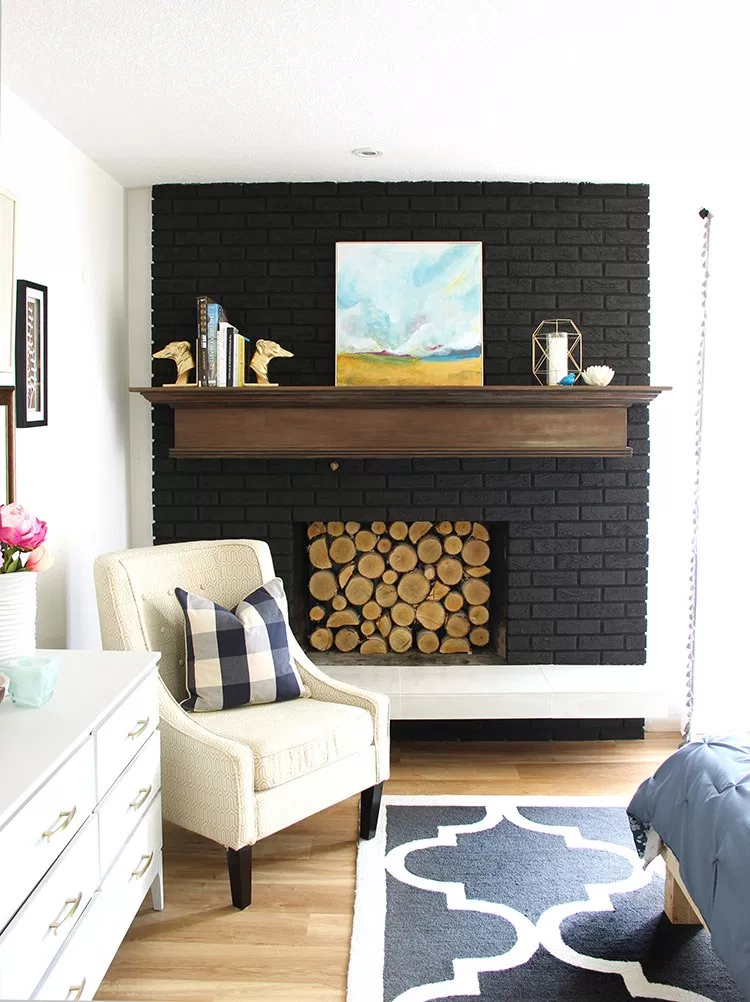
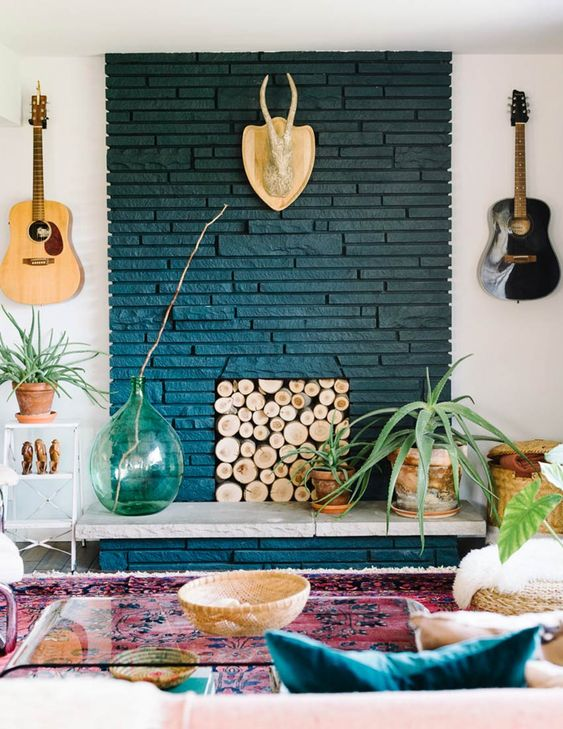
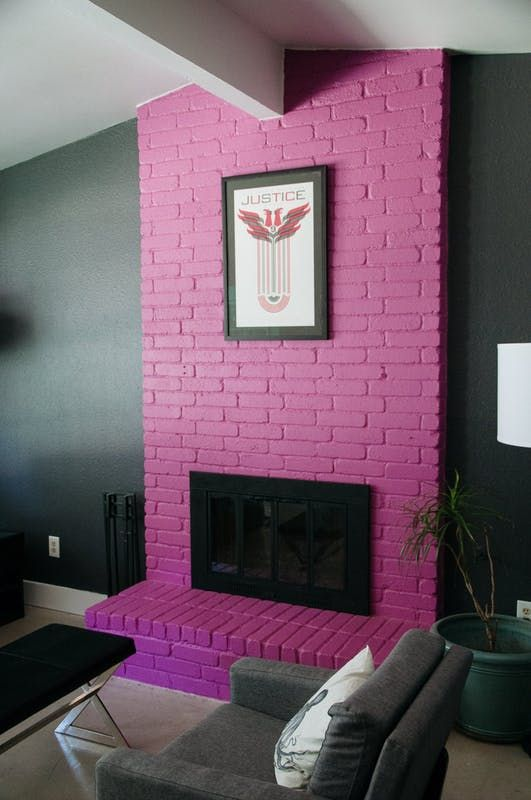
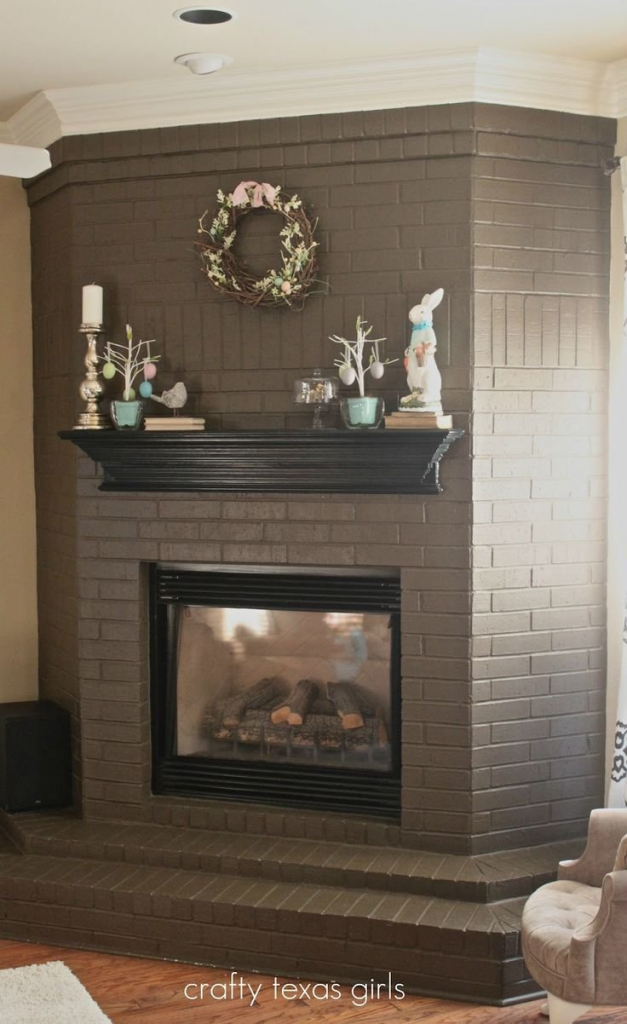
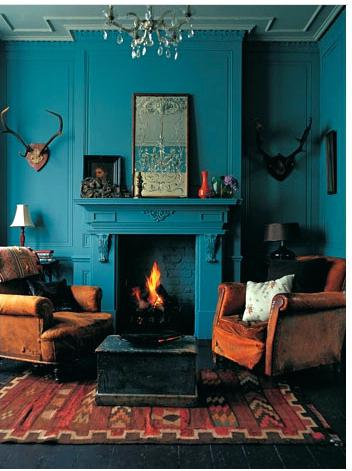
Bold and Dramatic
https://docs.google.com/document/d/1IXBmszBoHgIEJv5seg3NCEbNO9j3IpqT8M0VqlMnnF8/edit
http://www.designsponge.com/2013/03/sneak-peek-hudson-valley-home-jersey-ice-cream-company.html
Photography by Maxwell Tielman.
https://www.pinterest.com/pin/AQanzHFrpNcSJUSJ44PwCgric9qsrfMjyVc6mN6wWdynj2_sJBOfFKU/
https://www.remodelaholic.com/gray-painted-fireplace/
https://homedesignlover.com/living-room-designs/painted-brick-fireplaces/
https://docs.google.com/document/d/1IXBmszBoHgIEJv5seg3NCEbNO9j3IpqT8M0VqlMnnF8/edit#
http://www.designsponge.com/2017/11/gutsy-color-in-a-canadian-gut-rehab.html
https://www.apartmenttherapy.com/setting-up-home-5-ways-to-make-a-lovely-living-room-206645?crlt.pid=camp.XvLdb3CUwZYt
https://www.apartmenttherapy.com/uniquely-interesting-one-of-a-kind-details-from-real-life-homes-225687?crlt.pid=camp.PSIIMjKvYjRe
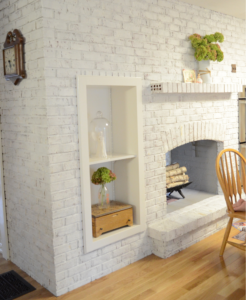
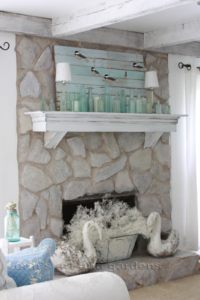
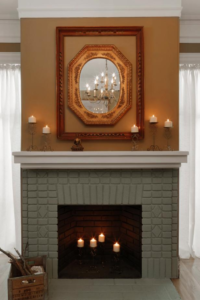
Natural - An Authentic “Real Brick” Look
www.brick-anew.com
http://2.bp.blogspot.com/_qm4HVkF5dxY/Sx7huehMEYI/AAAAAAAACEM/RE08eGx7UZw/s1600-h/brick+fireplace+brick+anew+after.png
German Schmear
https://www.pinterest.com/pin/AVN1bFgFci77KpQvPxFfLusc_Jq88iQpRGHUwJHCTkheVU4JYEAOp38/
https://www.pinterest.com/pin/648799890041207270/
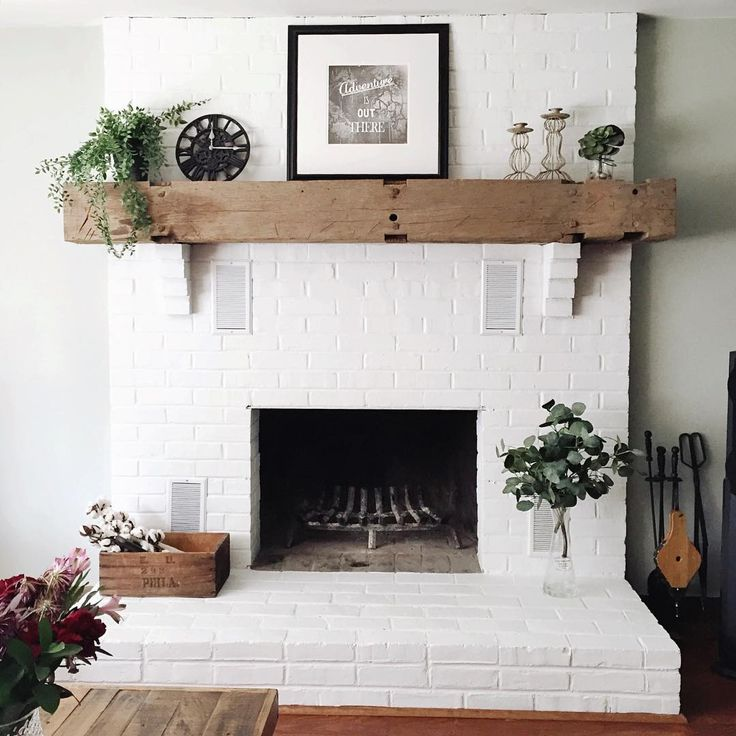
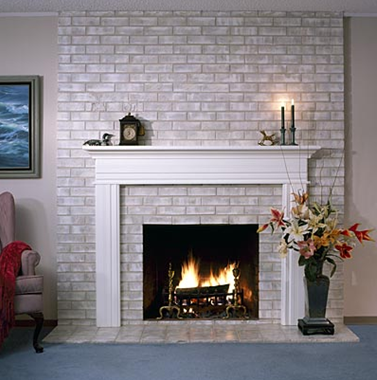
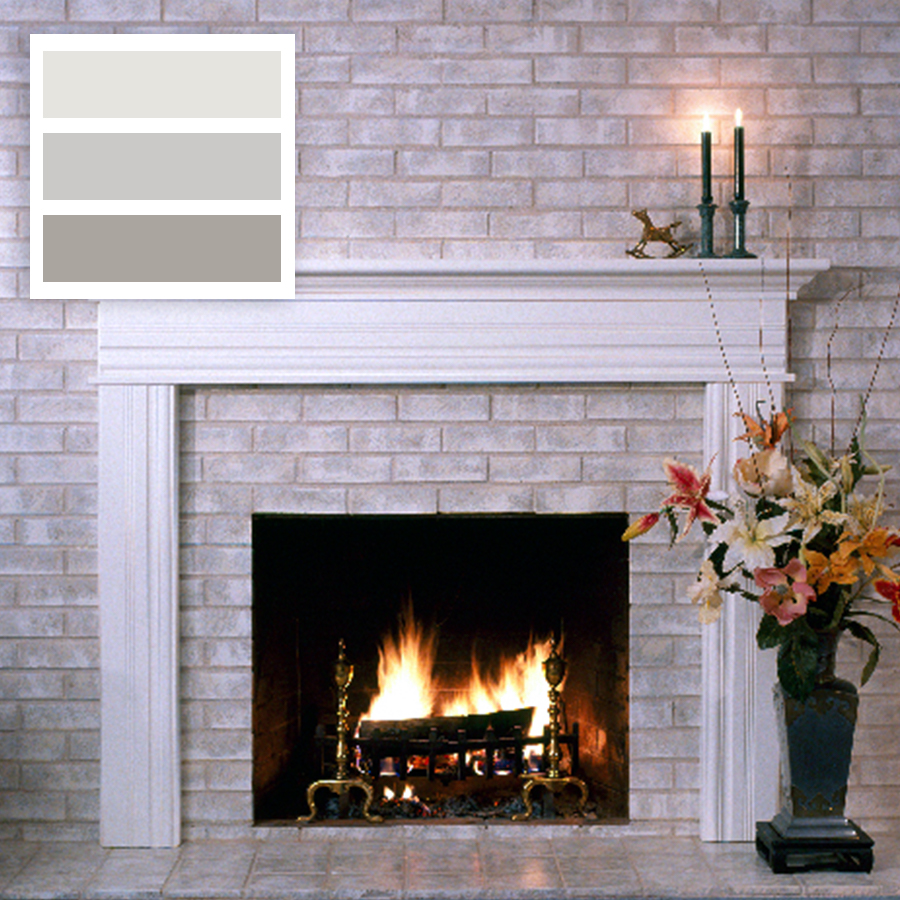
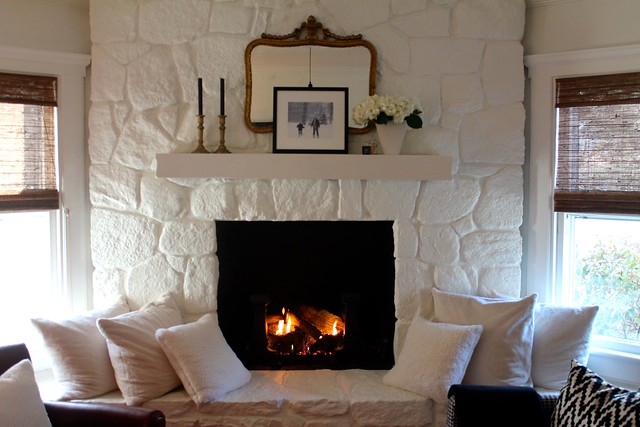
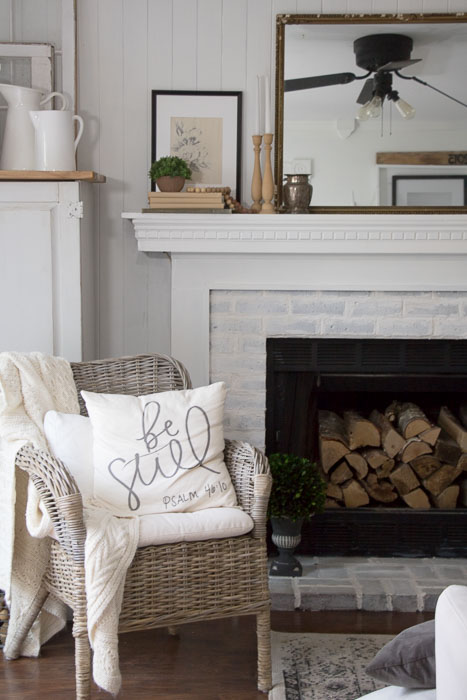
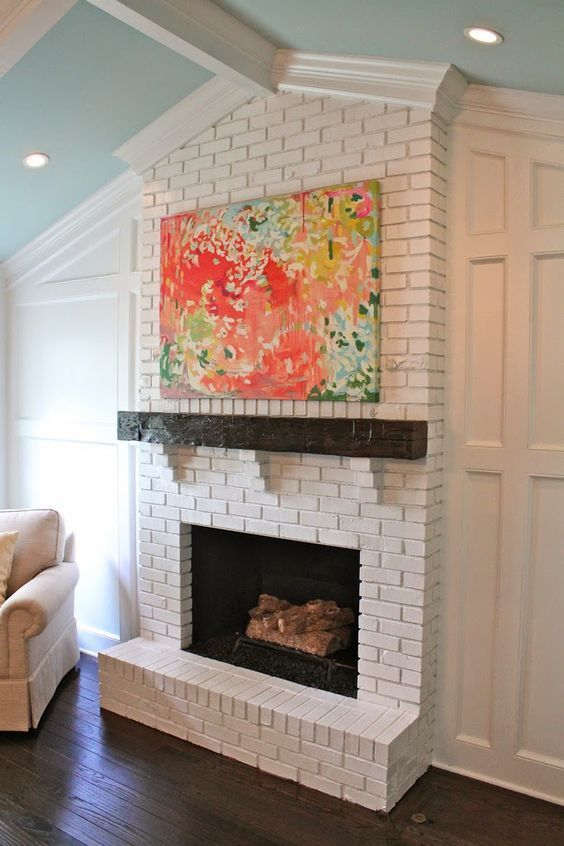
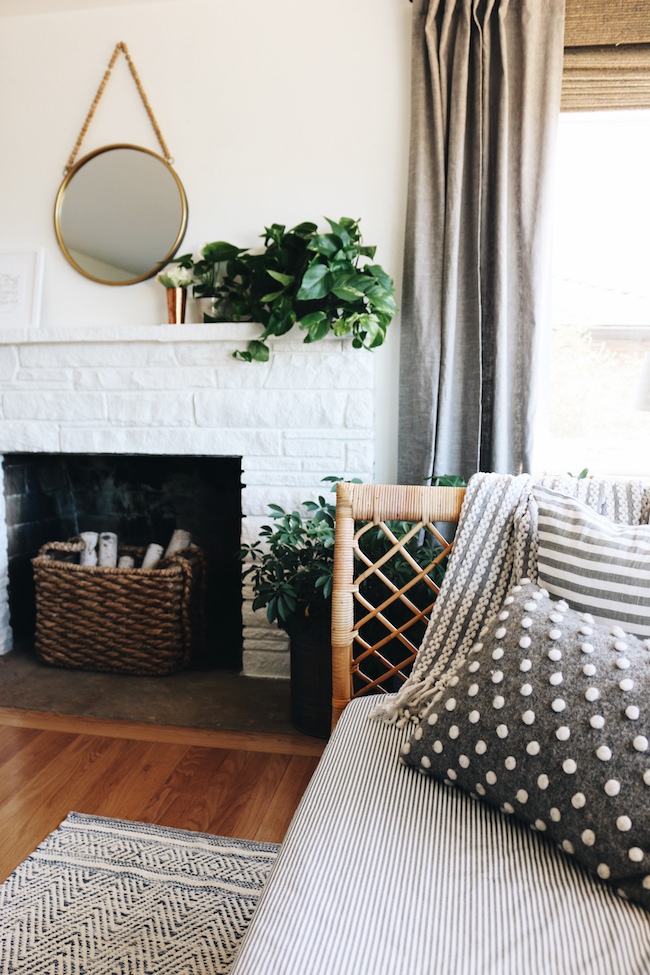
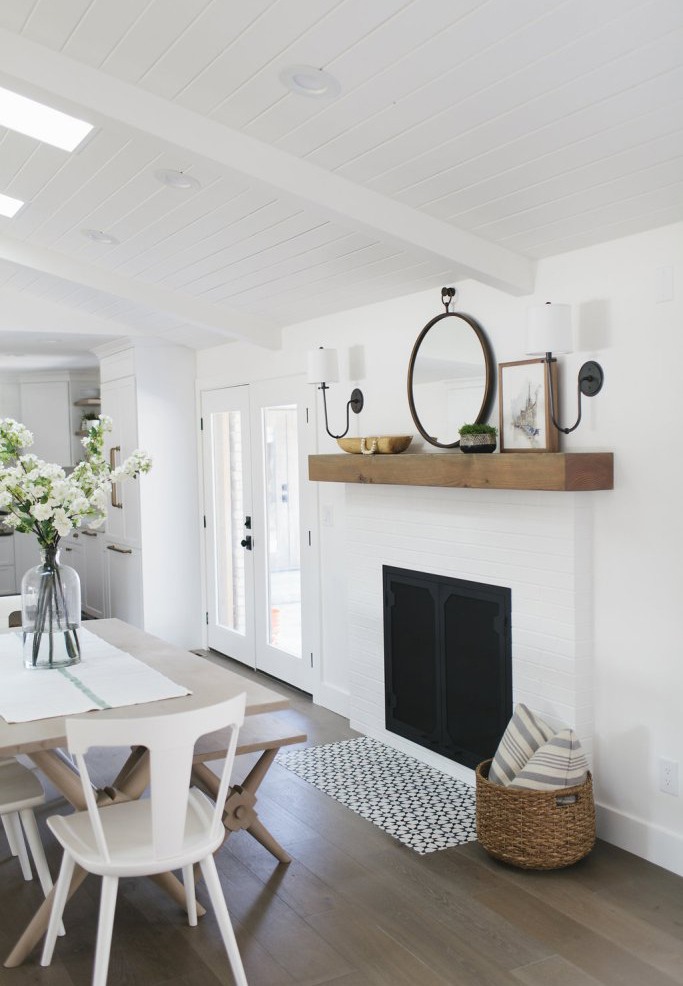
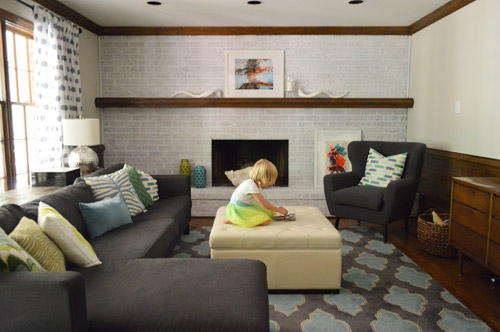
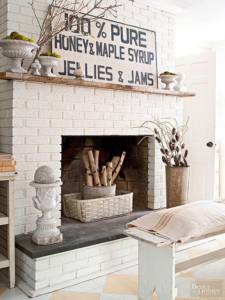
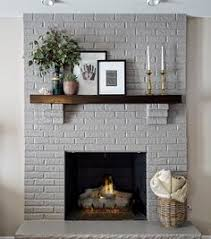
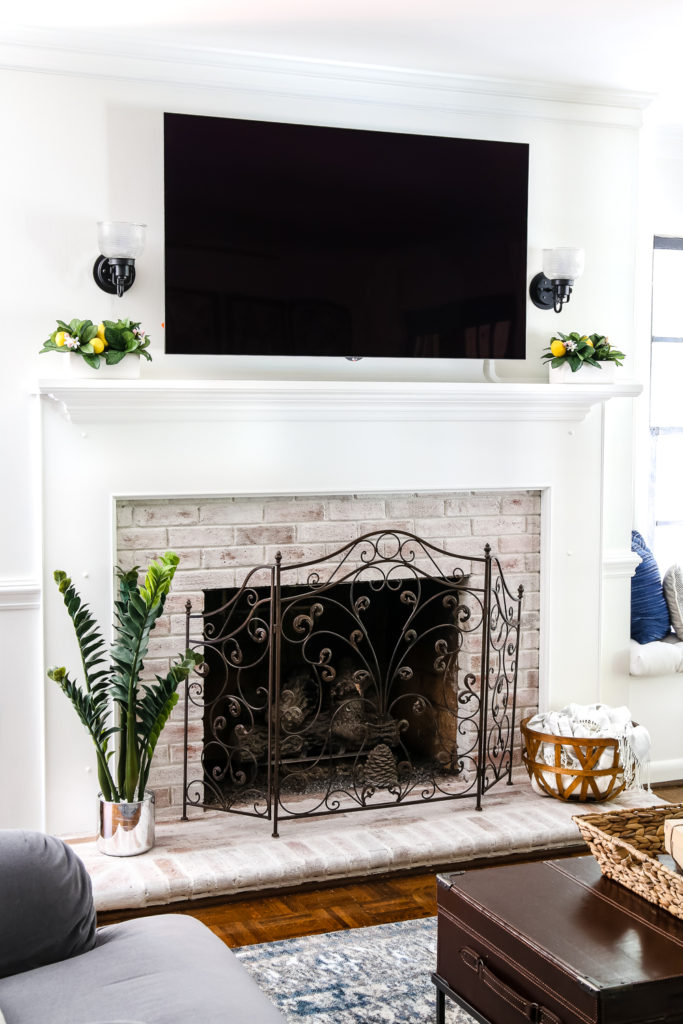
White - Light and Bright
https://www.pinterest.com/pin/67765169377518757/
https://www.krogen.co/painting-brick-fireplace-white/painting-brick-fireplace-white-best-25-painted-brick-fireplaces-ideas-on-pinterest-brick-by-photographer/
http://theinspiredroom.net/2017/08/22/white-painted-fireplace-makeover/
http://foxyoxie.com/fireplace-makeover-painting-the-brick-fireplace-white/
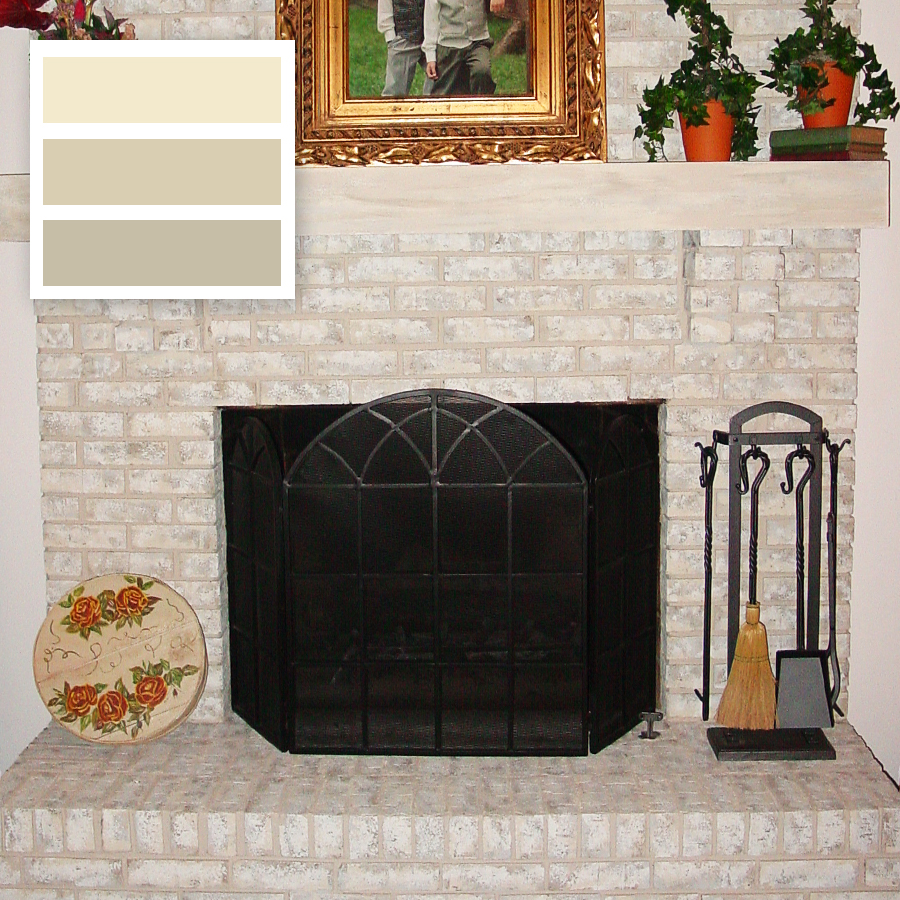
Whitewashed
https://www.younghouselove.com/2013/08/how-to-whitewash-brick/
https://diymyhomes.wordpress.com/2013/02/17/how-to-whitewash-your-brick-fireplace-brick/
http://diyhomedecorblogs.com/painting-brick-fireplaces-how-to-whitewash-brick-the-right-way/
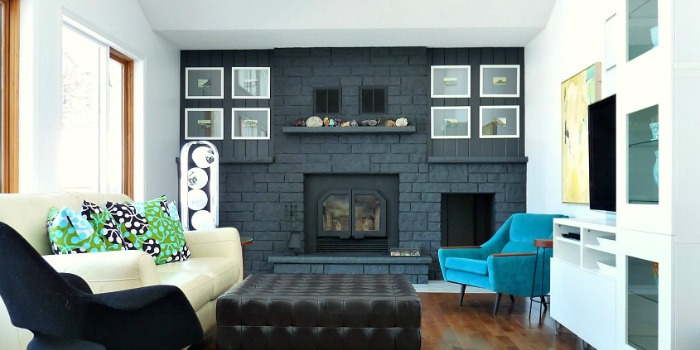
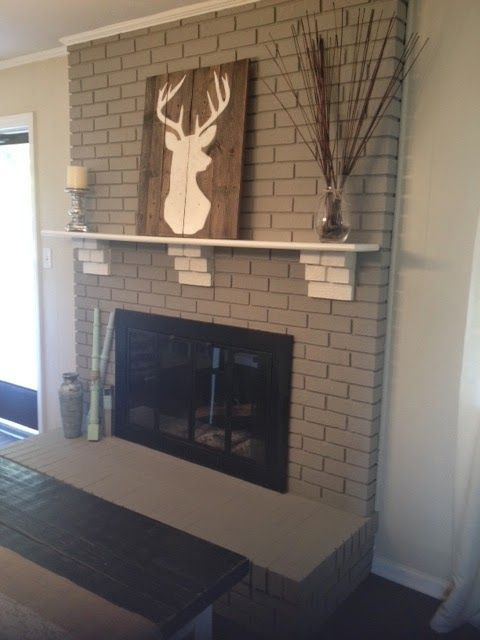
Solid Neutrals
http://thiswholehouse.blogspot.com/
http://hug-fu.com/1WL6e11_89al116/
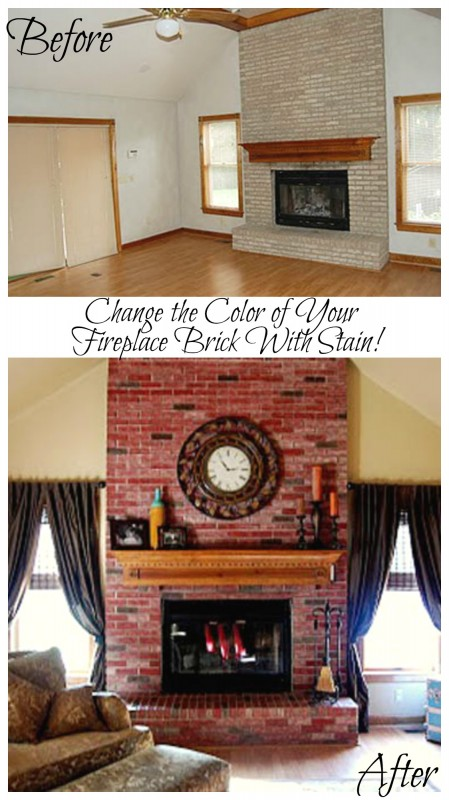
Brick Dye and Stain
http://www.dyebrick.com/product/brick-tinting-kit.html
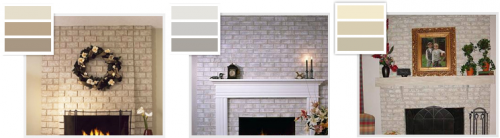
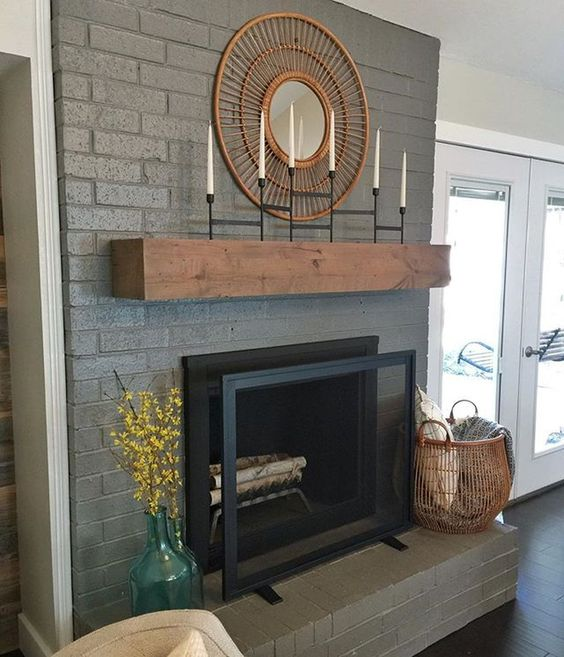
Deciding on a Color
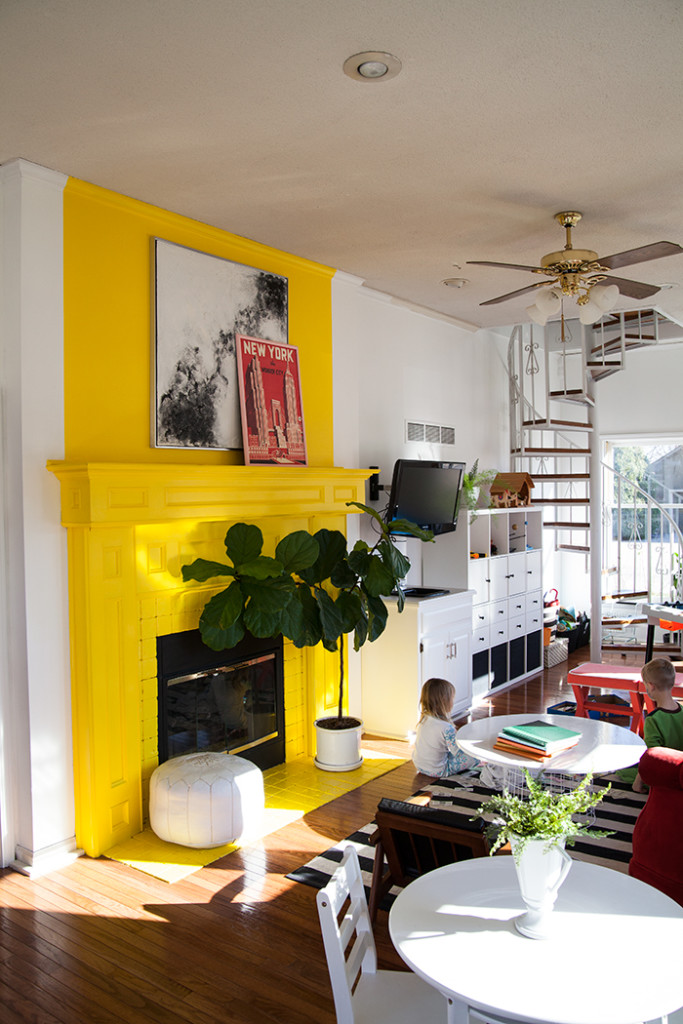
Ask yourself, “Do I want my fireplace to stand out or blend in with the room?” The color paint you choose will determine how much your fireplace becomes the focal point in your room. Dark colors will draw attention and create drama. If you want your fireplace to be the focal point in the room, a pop of color will draw attention to that area of your room.
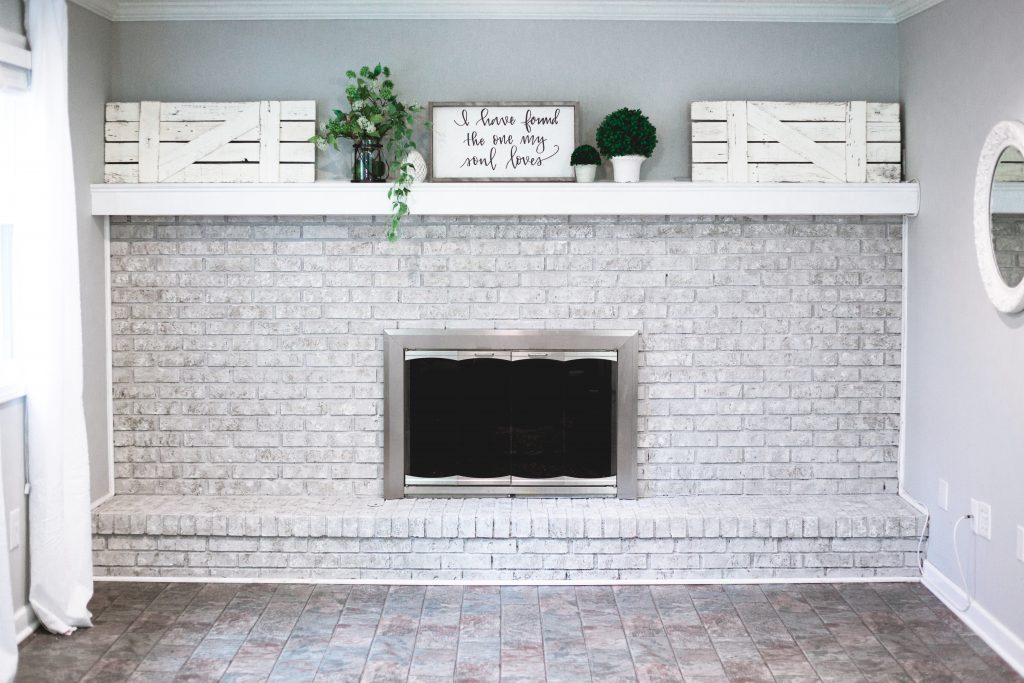
Keep It Neutral
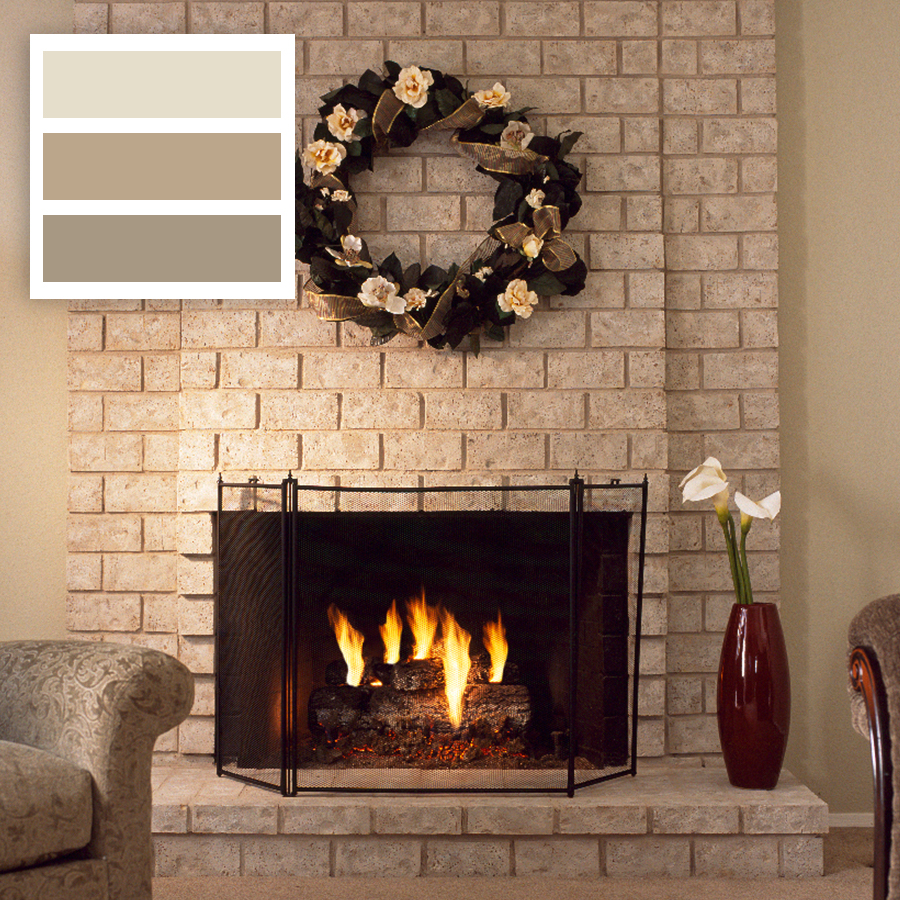
Shades of white and off-white create a calm neutral look. Tan, beige, cream and light gray blend in for a natural look. Soft shades of black and gray work well with contemporary style rooms. Whitewashing, painting a solid light neutral color, or using a product such as Brick-Anew to create a “real brick” look will blend in with any decor.
Create a Contrast
Painting the fireplace brick a darker color with light colored walls can create an interesting contrast. You can also create a contrast by painting the brick and the mantel different shades.
For example, a white painted brick with a black mantel makes a bold statement.
Go Monochromatic
If you want the fireplace to blend in completely with the room, try painting the walls and the fireplace brick the same or similar colors. Soft, light shades create a calm, serene atmosphere in the room and downplay the fireplace as the focal point in the room.
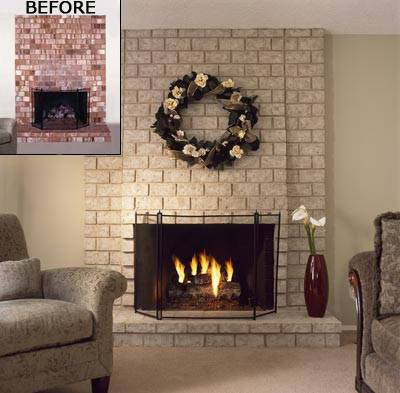
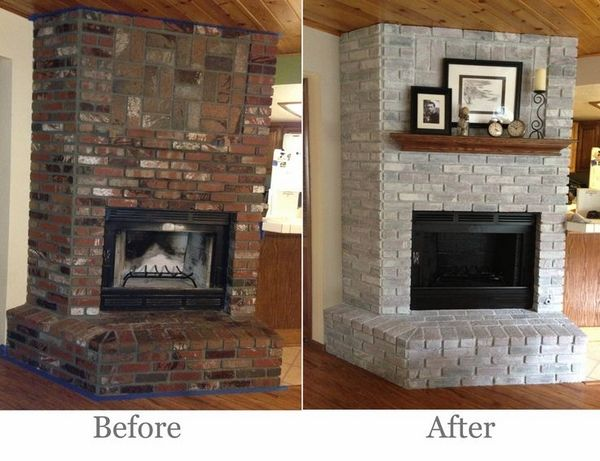
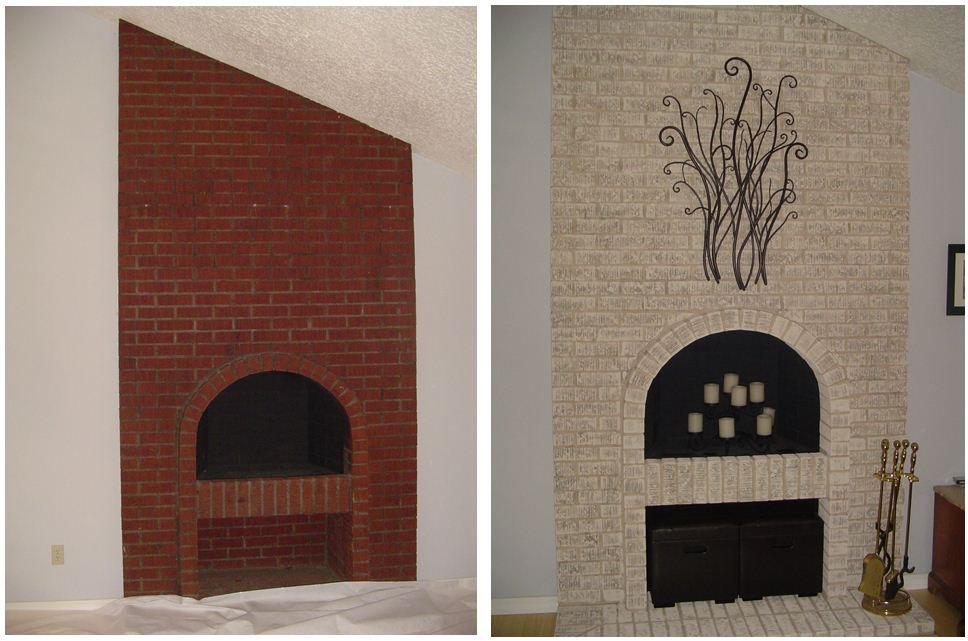
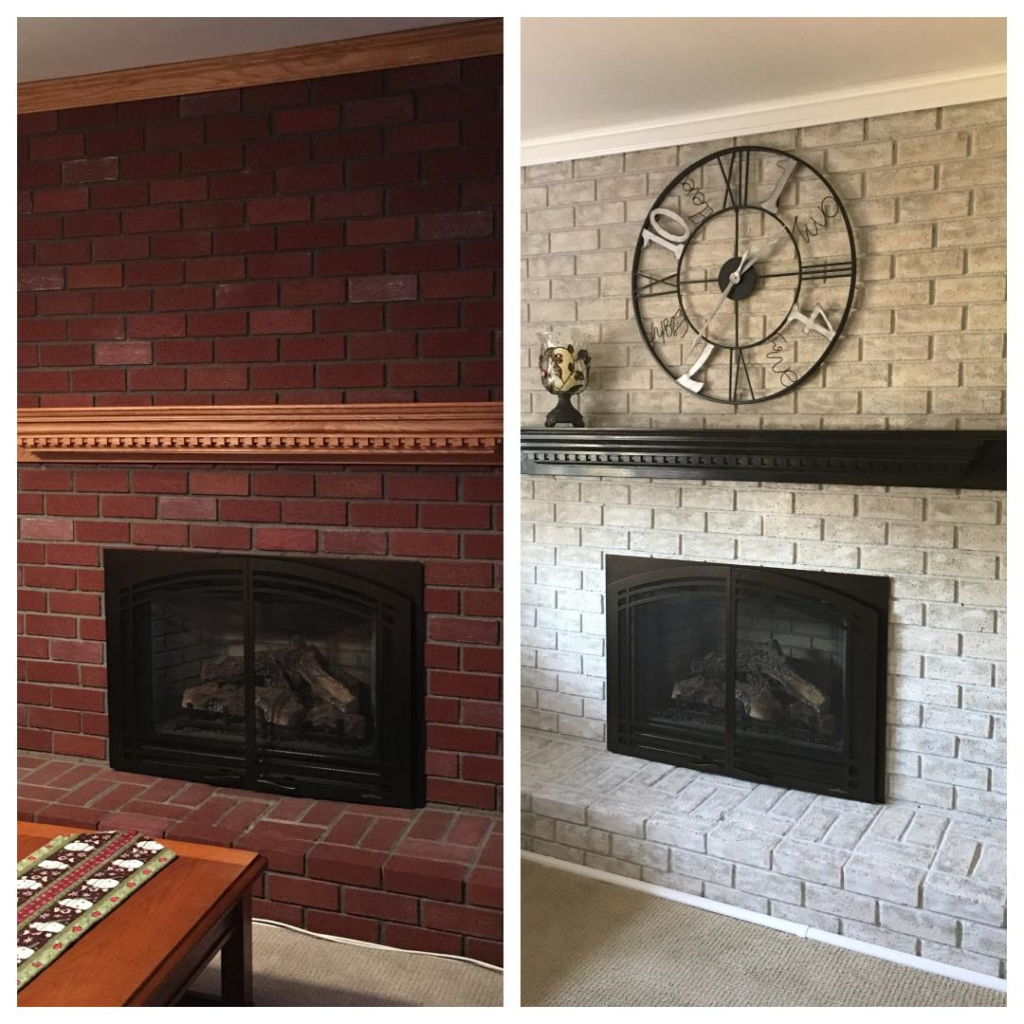
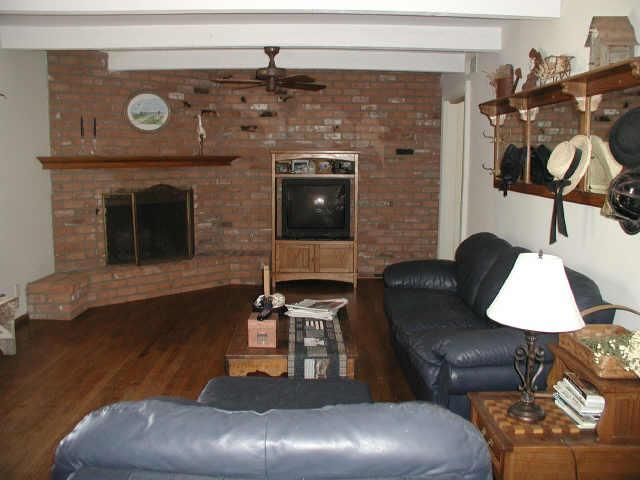
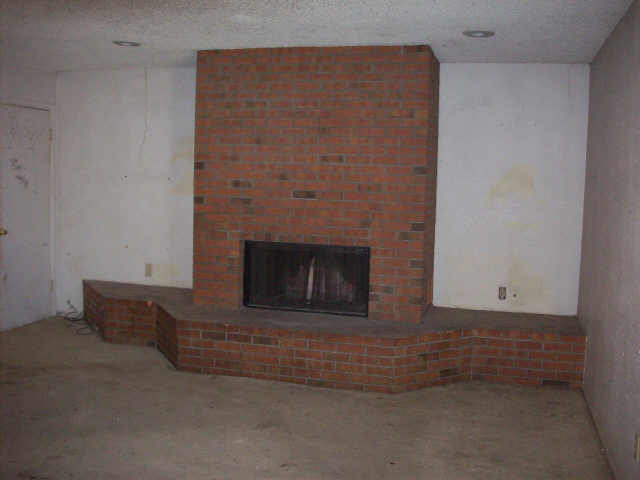
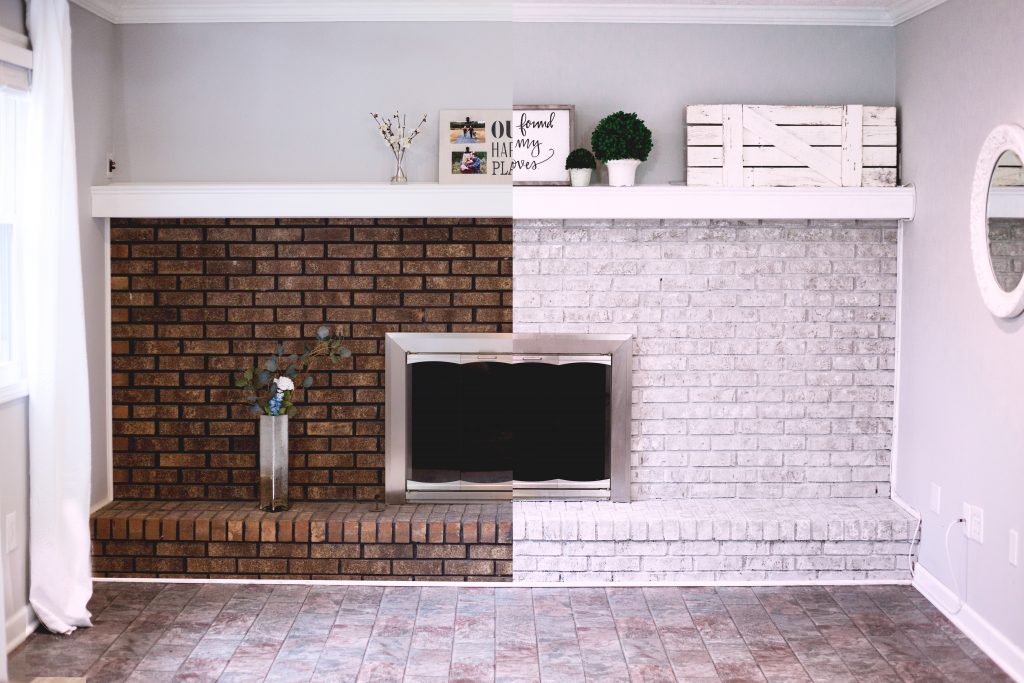
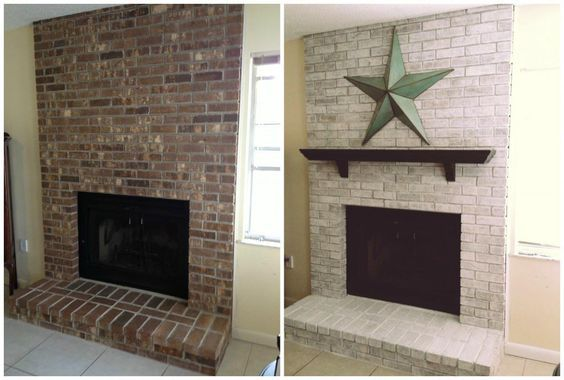
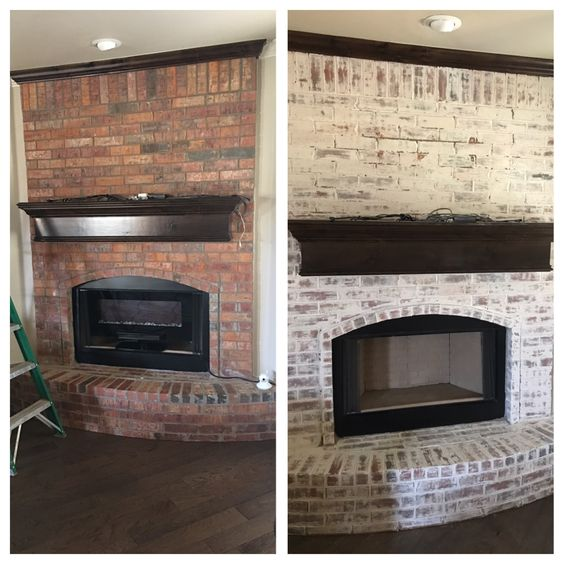
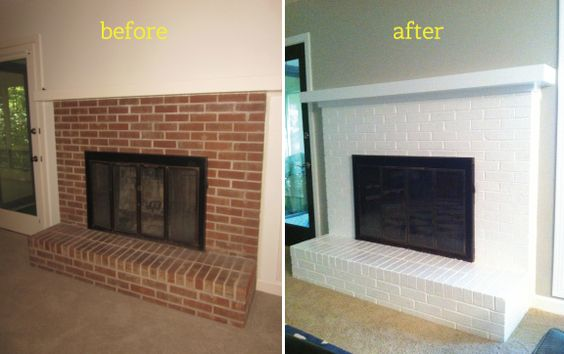
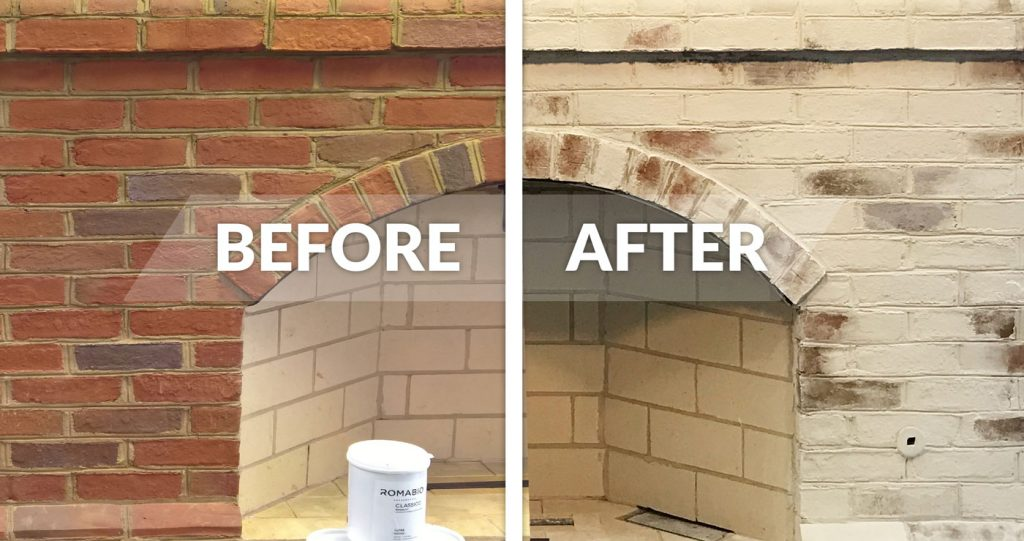
Before /After Pictures of Painted Brick Fireplaces
German Smear Painting Technique- Fireplace Before/After
http://remodelingroad.org/a-more-beautiful-home-through-improved-flooring/
Whitewashing a Brick Fireplace/ Before/After
http://bestfireplacedesigns.com/whitewash-brick-fireplace/whitewash-brick-fireplace-before-and-after/
Painting a Fireplace Solid White - Before/After
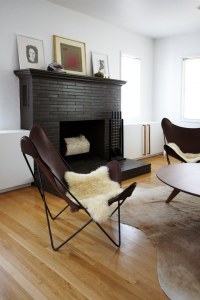
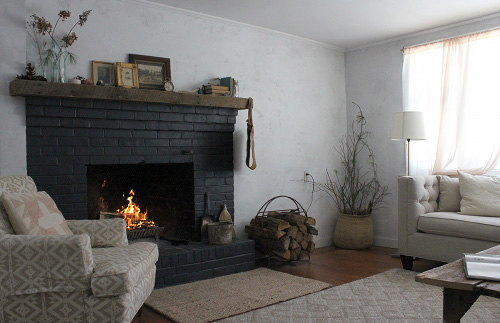
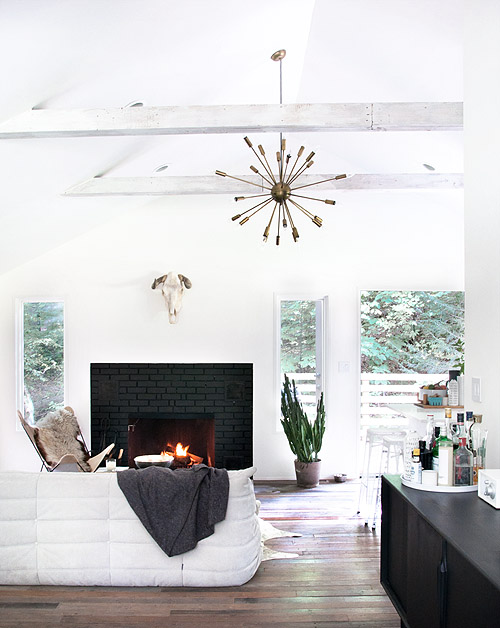
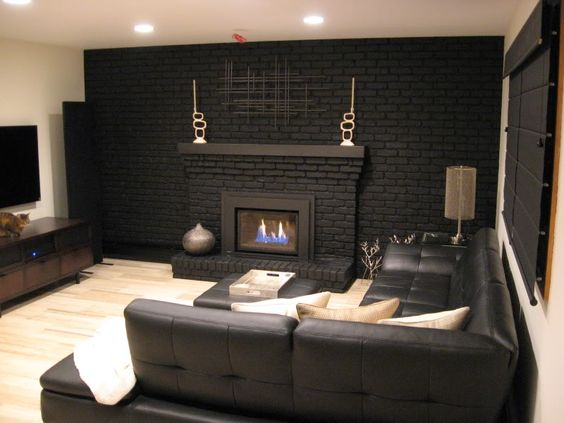
Painting a Brick Fireplace Black - Before/After
How to Paint Your Brick Fireplace a Solid Color
Here’s some steps on how to paint your red brick fireplace. Painting your brick fireplace can usually be done in just a few hours and can change the look of your room and give your fireplace an instant facelift.
1. Choose a color
Before you get started, you’ll need to choose an indoor latex paint color. Decide whether you want a dark bold look or a lighter natural look and choose your paint accordingly. Consider your wall color and furnishings and how you want your room to feel - cozy and warm or light and airy.
2. Prepare materials
Next, get your materials together.
You’ll need:
- paint roller
- large sturdy paint brush
- small paint brush
- drop cloth
- safety goggles
- gloves
- wire scrub brush
- TSP (trisodium phosphate)
- cleaner
- bucket
- painters tape
- oil-based primer
- Indoor latex paint
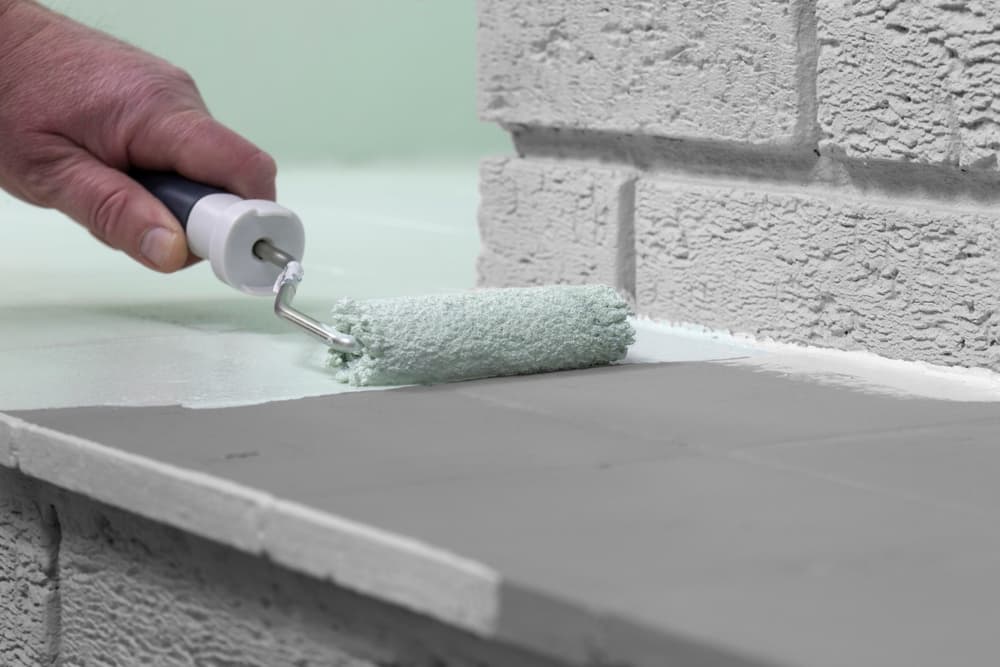
3. Clean and Rinse the Brick
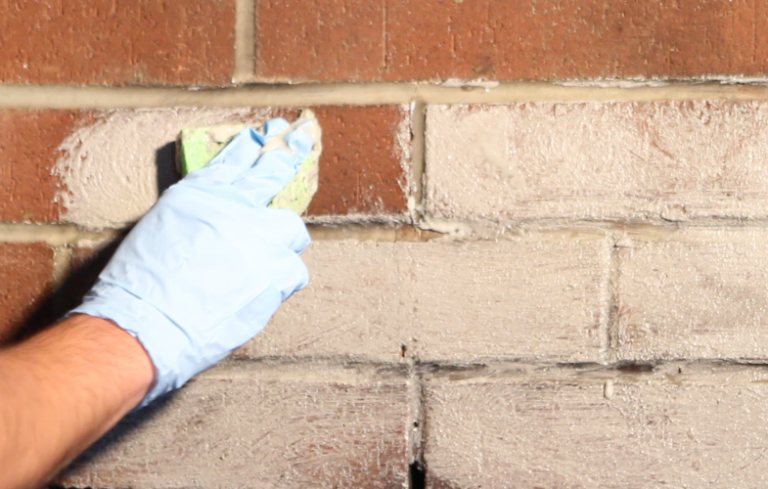
Lay down a drop cloth to protect your floor and put on your safety goggles. You’ll need to clean the brick before you begin painting. First, use a small brush broom to brush off the brick and remove any dust, dirt or loose mortar. Then you can use a scrub brush and a bucket of soap and water and/or some brick and stone cleaner to remove any soot or grime from your bricks. If your fireplace brick is especially dirty, you can use a wire scrub brush and TSP (trisodium phosphate) and then use your cleaner. Rinse your brick thoroughly.
4. Apply the Primer
Tape off the area around the edge of your bricks so the surrounding area will be protected from paint splatters. Apply the oil-based primer using your large brush, covering all the brick and mortar. You can choose to use a roller or a brush for this step. Use the small brush to get into crevices and corner areas of the brick and hard to reach spots. The primer will help protect your painted brick from soot stains when you burn real wood.
5. Apply the Paint
After you rinse your brushes and wait for the primer to dry, you’re ready to begin the last step of your fireplace painting project. Whether you chose flat, semi-gloss,or high gloss heat resistant indoor latex paint, all these types are applied the same way. Roll or brush on the latex paint covering all the the brick and mortar using either your large brush or roller and your small brush for crevices and hard to reach spots. You might want to use your roller on this step if your brick is rough or textured. Be sure to get the paint into all the mortar lines and all areas of your brick surface. You can apply a second or third coat of latex paint if you choose, letting each coat dry before applying the next. Remember, this type latex paint is not for use inside the firebox, the area where you build a fire.
The firebox area needs a specific type of paint. A special high temperature paint is required for that area that withstands temperatures up to 1200 degrees Fahrenheit without chipping, blistering, or peeling. This type of high temperature paint can be used on wood stoves, and grills as well as inside the firebox. It’s important not to neglect the firebox area since it’s the center of the fireplace. Having a soot stained firebox can take away from all your hard work painting and refreshing your fireplace. Firebox paint comes in a variety of colors but the most common colors are almond, sand and basic black. This type paint comes in a spray or in a small can where you need a brush to apply. Black tends to be the most common color chosen since it will hide soot stains and dirt easier than the lighter colored choices. The ease of the spray can makes the paint job go quicker but some people prefer the brush on type since it allows for more control. Whether you choose the spray or the brush on high temperature paint, you’ll need to have plenty of ventilation in your room until the paint dries since it has a harsh odor.
Pros: Cheap, Easy, Quick Fix for Ugly Brick
Cons: You need to like the “painted brick” look.
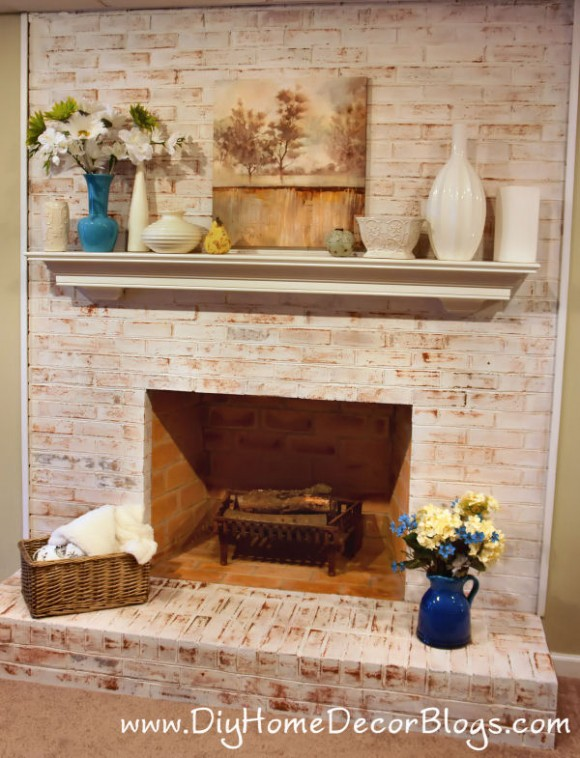
How to Whitewash your Brick Fireplace
If you want to paint your brick fireplace but want some of your brick to show through, whitewashing could be an option for you. Whitewashing involves painting over your brick with a thin, translucent paint solution rather than the thicker latex paint which covers the entire brick surface.
Here’s how to get the whitewashed look for your brick:
Materials:
- Latex Paint
- Water
- Old Rag
- Paintbrush
- Bucket
- Drop Cloth
1. Mix paint solution
First, mix 1 part water with one part latex paint in an cream, off-white, white, or eggshell color.
2. Apply paint solution
Next, brush the solution over each brick, using the rag to blend it in the brick and keep it from dripping.
3. Assess and reapply
Then, after you’ve covered all the bricks, step back and take a look to see of you’d like to go over the fireplace again with another coat. You should see the brick peeking through the paint . You might decide to repeat the process a few times until you get the look you want.
https://www.pinterest.com/pin/532550724657829903/
How to “German Smear” - A Brick Mortar Wash Whitewashing Technique
The German Smear brick whitewashing technique gives a look similar to basic whitewashing but with a more choppy or uneven look.
Here’s the materials you’ll need:
- Bucket
- Stiff Bristle Brush
- Sponge
- White Mortar
- Painter’s Tape
- Drop Cloth
- Gloves
- Mortar Mix
1. Prepare fireplace
First, lay down your drop cloth and tape off the area you’ll be painting.
2. Mix mortar
Next, mix you mortar according to the instructions on the package. You might need to add a little extra water so the mixture will be the consistency of honey.Wet your sponge and dip it into the mortar on one end.
3. Apply mortar
Now, here’s the fun part...choose an area of the brick fireplace and smear the mortar on across the brick. After that, smear the mortar vertically. The point is to apply the mortar so that different areas of the brick have different amounts of the mortar. The look you’re going for is not uniform but choppy and uneven. If some areas have too much, wipe them off. If other areas have too little, add a little more. Keep standing back and looking at your work to see how you’re doing and if you’re getting the look you want. In different areas, the brick color should show through.
4. Go over with bristle brush
Use the stiff bristle brush to go over the entire fireplace with huge “x” patterns before the mortar dries. Break up any clumps in the mortar solution.
Pros: Cheap, Few Materials Needed, light look
Cons: The German Smear look isn’t for everyone and it can seem a bit scary to put mortar on your brick.
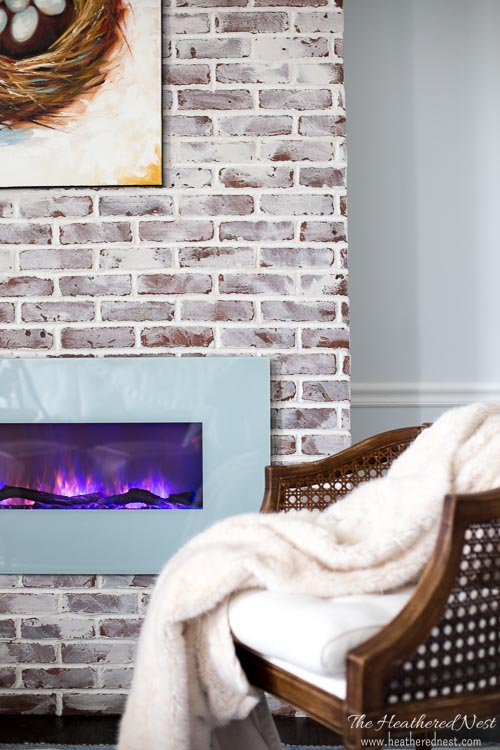
www.theheatherednest.com
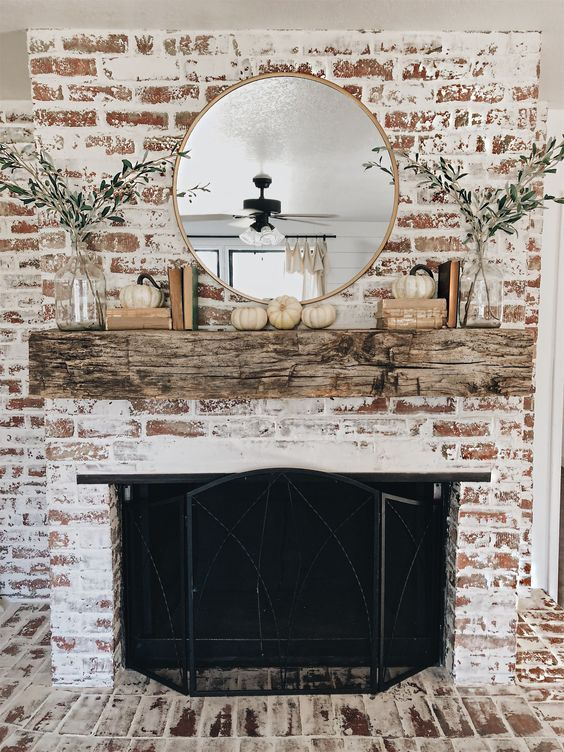
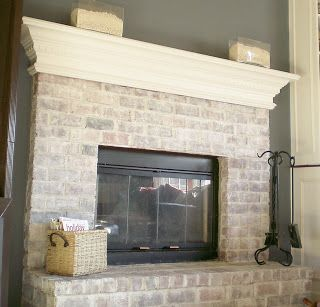
Natural-Looking - A “Real Brick Look”
If you’re not sold on the idea of painting your fireplace brick a solid color or whitewashing, keeping a “real brick” instead of a painted brick look might be the right choice for you. Men especially would rather live with an outdated look than put a drop of paint on their fireplace, no matter how ugly the brick. The reason? Many men do not like the painted brick look. So what’s a wife to do?
There is a solution to this age old dilemma: paint your brick using a technique that makes both hubby and wife happy and restores marital bliss. Use a paint technique that some would call “faux painting” to keep the look of real brick but get a lighter color.
Brick-Anew.com sells a do it yourself paint kit that includes 5 shades of paint that work together to make a mottled, real brick look. The kit includes all the materials you’ll need for the project.
Materials in the Brick-Anew DIY Paint Kit:
- Rollers
- Brushes
- Sea Sponge
- Gloves
- Paint Tray
- Painter’s Tape
- 5 shades of Latex Paint Product
- Step by Step Instructions
The Brick-Anew process involves painting on a base coat and then applying the five shades of “undertone” colors using a paint roller or a sponge according to the detailed instructions. The final result? A brick fireplace that looks like you ripped out the outdated brick and replaced it with a new lighter colored brick. The Brick-Anew Kit comes in three color choices.
Twilight Taupe Misty Harbor Frosted Sunshine
Pros: Easy to Use, All materials Included, Step by Step Instructions, Good Choice for non-professional DIY’ers, Money Back Guarantee, Full customer service support.
Cons: Need to purchase online - Not available at hardware stores.
www.brick-anew.com
How to Dye/Stain Brick
Using brick dye or staining your brick gives a look much different than painting. Brick stains come in a variety of colors and is applied to the bricks’ surface to change the color of the brick without a thick coating of paint.
Materials You’ll Need:
- Rubber Gloves
- Bucket of Soapy Water
- Safety Goggles
- Paint Brush
If you decide you’d like to try staining your brick, you need to test out an area of your brick to see if it absorbs water. Splash some water on the brick to see if the water is absorbed. If so, your brick can be stained. If the water bubbles up and does not absorb into the brick, you’ll need to try to remove any sealant that is coating the brick.
To remove the sealant, apply a lacquer sealer and let it sit for about 10 minutes before wiping it off. Try the water test again to see if it absorbs. If it does, apply the lacquer sealer over the entire area.
If it does not work and the water still won’t absorb, try a concrete sealer stripper. If that doesn’t work, you’ll need to paint over your brick instead of staining. Some types of brick are made not to absorb water.
1. Clean the brick
Clean the bricks using a mild detergent to remove any dirt, soot, grime, or mildew. You could hire a professional to pressure wash the brick if you don’t think you can clean it yourself.
2. Test the stain
Once the brick has dried, choose a water -based brick stain that comes in the color you want. Some stains and dyes come in small pots so you can try out a color before you purchase an entire container. Mix the stain with water according to the manufacturer’s instructions.
Try the stain on a small inconspicuous area and let it dry completely before moving on with your project. Since stains are permanent, you need to be sure you’re satisfied with the look of the stain.
3. Apply the stain
Use your paintbrush to apply the stain to each brick working carefully to avoid getting paint in the mortar lines. Work in a scattered pattern rather than in a straight line.
Working in a scattered pattern gives a more natural look. Work carefully being sure not to drip stain or get stain on the mortar. Clean all tools immediately after finishing your project..
http://www.dyebrick.com/product/colourpanels.html
https://www.remodelaholic.com/update-the-color-of-your-brick-stained-brick-fireplace/
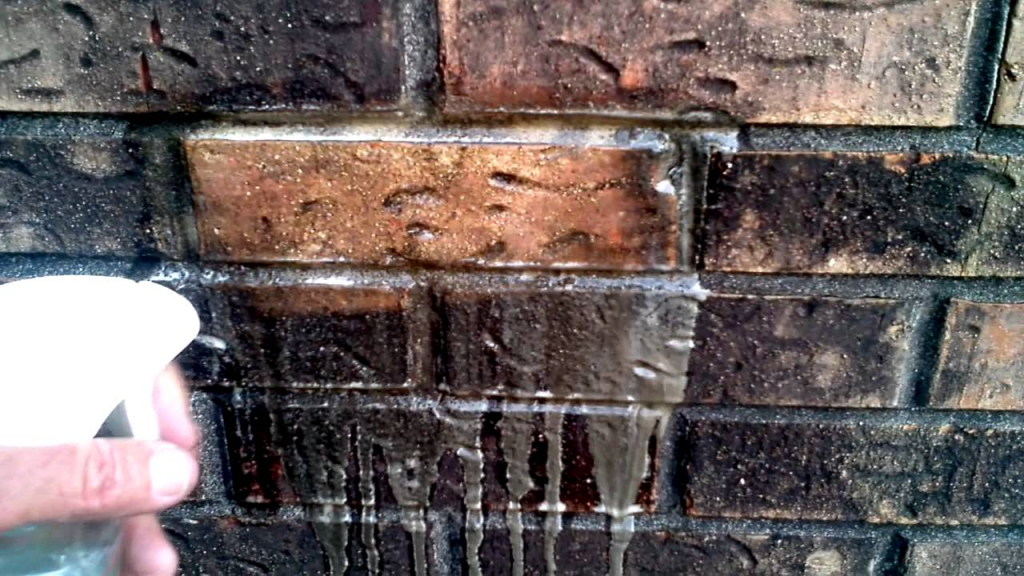
Prepping to Paint / How to Clean Your Brick Fireplace
Natural Brick Cleaners
You’ll need to clean your fireplace brick before beginning your painting project so the paint will adhere properly. First, use a broom or shop vac to remove any soot, dirt, or dust from your brick. You can use natural cleaners with ingredients you have around your house. You can make a thin paste by mixing 2 tablespoons of cream of tartar with a little water. Apply this mixture to the brick and let it sit for about 10 minutes before wiping it off with a damp cloth.
For a large area, you can mix vinegar and water in equal parts in a spray bottle. Let the mixture sit on the bricks for about 10 minutes and rub off with a cloth. One half cup of baking soda and 3 tablespoons of dish detergent make a paste you can apply to dirty bricks. Let the mixture sit for 10 minutes and rinse off with water.
Store-Bought Brick Cleaners
If you’d like to buy a cleaning product, Rutland makes a good Brick and Stone Cleaner that comes in a spray bottle. Simply spray on the brick and wipe clean.
For tougher jobs or a very large area, you might want to try trisodium phosphate (TSP) that you can find at your local hardware store. You can use a heavy duty scrub brush with TSP, and be sure to wear protective goggles and rubber gloves when using this product.
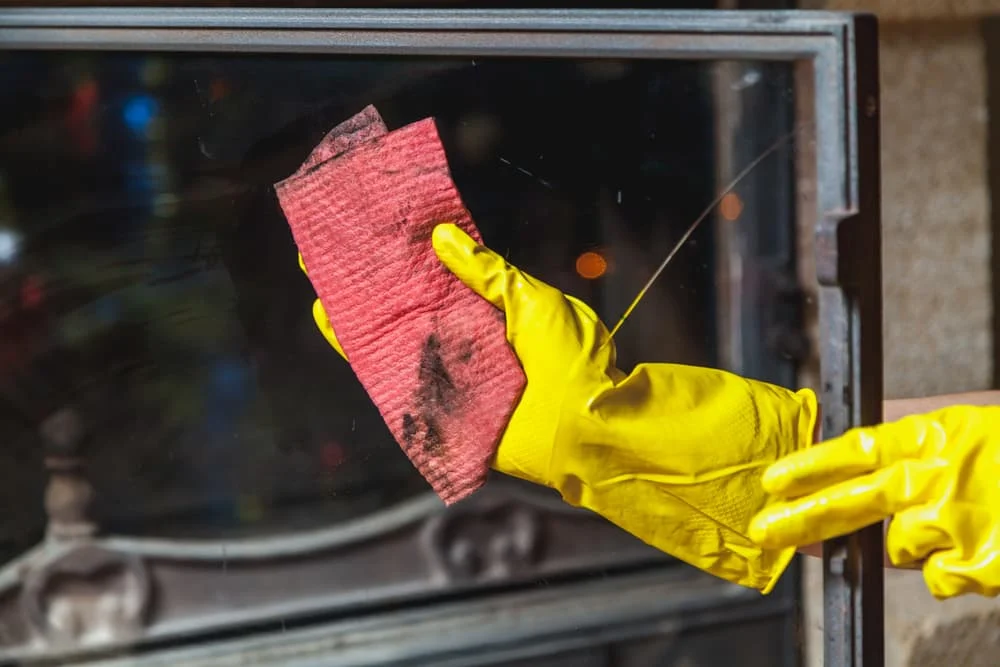
How to Clean and Paint the Firebox
The firebox is the part of your fireplace where the fire burns. After a long winter of hard work, the firebox turns into a dirty, filthy mess. Cleaning the firebox after fireplace season is over is essential to keeping your fireplace looking good.
1. Clean firebox
First, remove any pieces of wood left over from past fires. Use a shop vac to remove all leftover soot, ashes, dust, and dirt. After the firebox is cleared of all debris, use soap and water and a heavy duty scrub brush to clean the walls and floor of the firebox.
2. Apply high temperature paint
After the firebox is clean, use a high temperature paint such as Rutland’s Grill and Stove Paint to coat the entire firebox. This high temperature paint withstands temperatures up to 1200 degrees Fahrenheit without bubbling, blistering or peeling and it comes in several colors. Most people prefer basic black since the dark color tends to hide stains better than lighter colors. This paint comes in spray or in brush-on cans. You can paint the wood holder/ grate with this type paint as well.
Painting Brick Fireplaces - Types of Paint
- Latex Paint - A durable paint that dries quickly.
- Oil-Based Paint - Oil based paint takes longer to dry and has a sheen.
- Chalk Paint - A type of flat paint can be used for whitewashing.
- Polyurethane - A water-based polyurethane can be applied over the painted brick surface to protect the painted surface from scratching.
- High Temperature Paint - This type paint can withstand high temperatures inside the firebox.
- Brick-Anew Paint Kit - This paint kit has five shades of latex paint product suitable for use on brick.
Final Thoughts
Painting your brick fireplace can be one of the best DIY projects you’ll ever do. Inexpensive and easy, painting can transform the look of your your fireplace and your room in just a few hours. And if you don’t like the final look...no problem. Just paint over the brick again with a different color or choose another remodeling option.
If your outdated brick fireplace sucks the life out of your room, why not give painting a try? The fireplace should be the heart of the home. A soothing place for friends and family to gather or a spot to unwind after a hard day.
Start creating new memories by the fire. Paint your fireplace and see what happens. I think you’ll be glad you did.
https://www.shineyourlightblog.com/painting-interior-fireplace/


